API Integration Guide
1. Introduction to API Integration Platforms
We provide YCloud, NxCloud, Chat App, and ITNIO TECH agent integration to help you access faster! The following are the integration steps for the agent platform.
2. Step-by-Step Integration Guide
2.1. Integrate YCloud Business API Number
Please register with YCloud first, add WABA/number through YCloud, and then synchronize it to SaleSmartly via the YCloud API:
https://www.ycloud.com/?utm_invite_code=fangchen
2.1.1. Log in to YCloud
If you have registered a YCloud account, please log in first:
https://www.ycloud.com/console/#/entry/login

Open Verify > Getting started to view and copy the API Key.

2.1.2. Tutorial on Registering WhatsApp API Number in YCloud
Bind WhatsApp account:
https://www.ycloud.com/console/#/app/whatsApp/getStarted
Binding tutorial:
https://www.bilibili.com/video/BV1Aa4y1g7di/
2.1.3. Fill in the API Key into SaleSmartly
Open the Integration-WhatsApp API page in SaleSmartly and click the Add Number button.

In the integrated pop-up window, fill in the YCloud API Key and click the OK button to complete the YCloud commercial API number access.

2.2. Integrate NxCloud Business API Number
Please register with NxCloud first, fill in the corresponding information, and then add WABA/number through NxCloud, which can be synchronized to SaleSmartly.
NxCloud login URL:
https://www.nxcloud.com/client/login
2.2.1. Log in to NxCloud and Copy AccessKey and AccessSecret
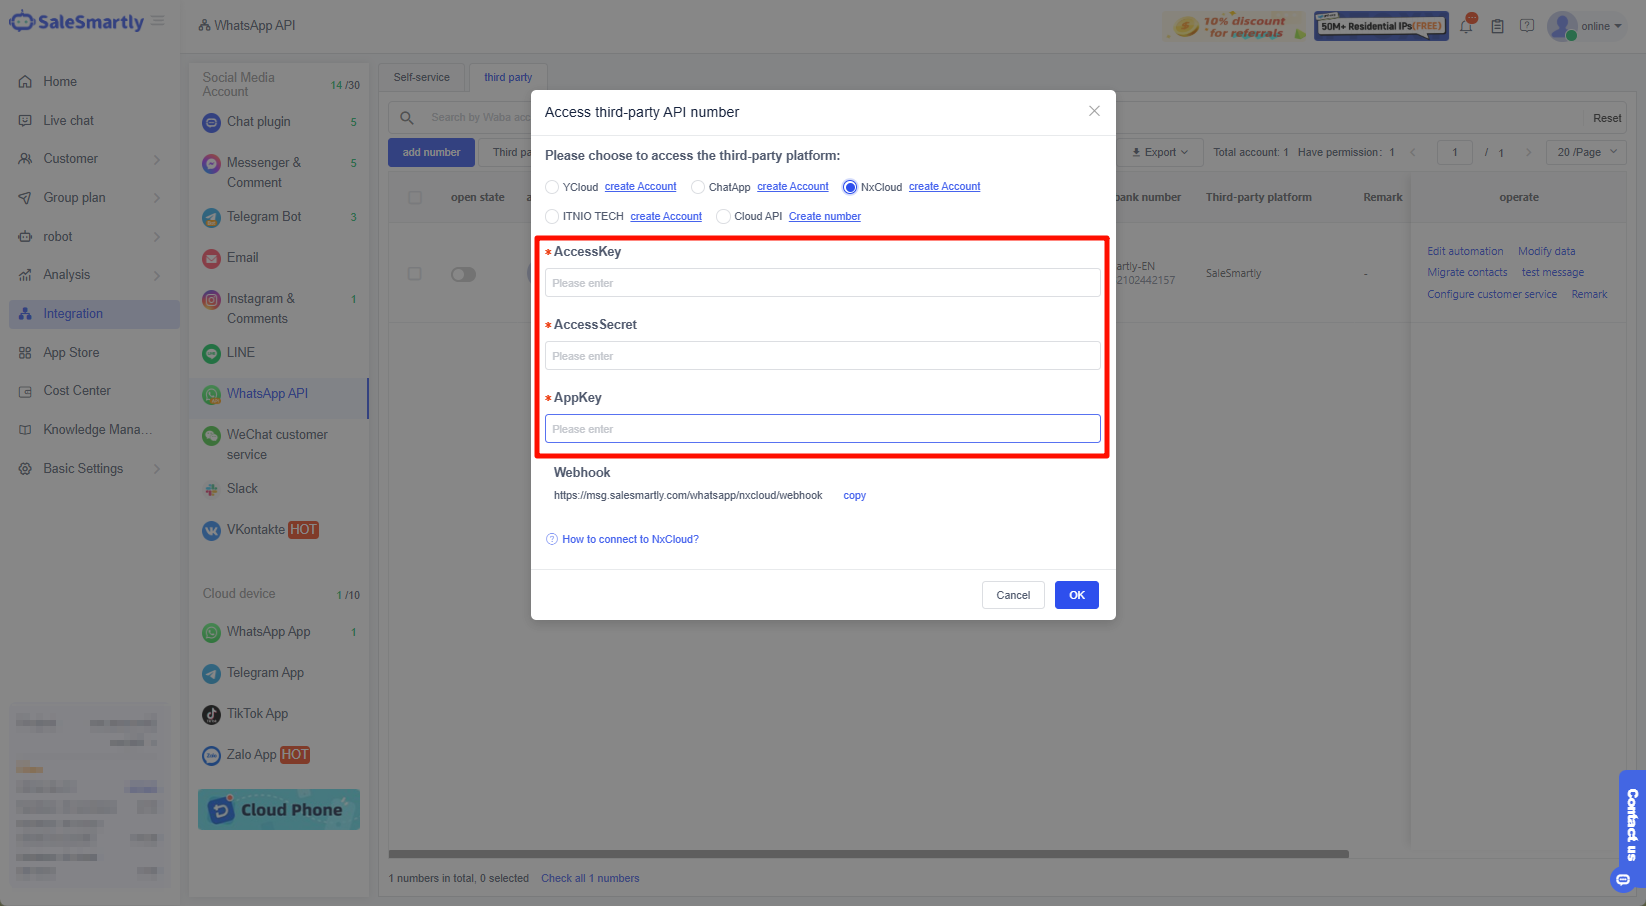
After logging in to NxCloud, go to Console-Homepage, find the AccessKey and AccessSecret values and copy them.
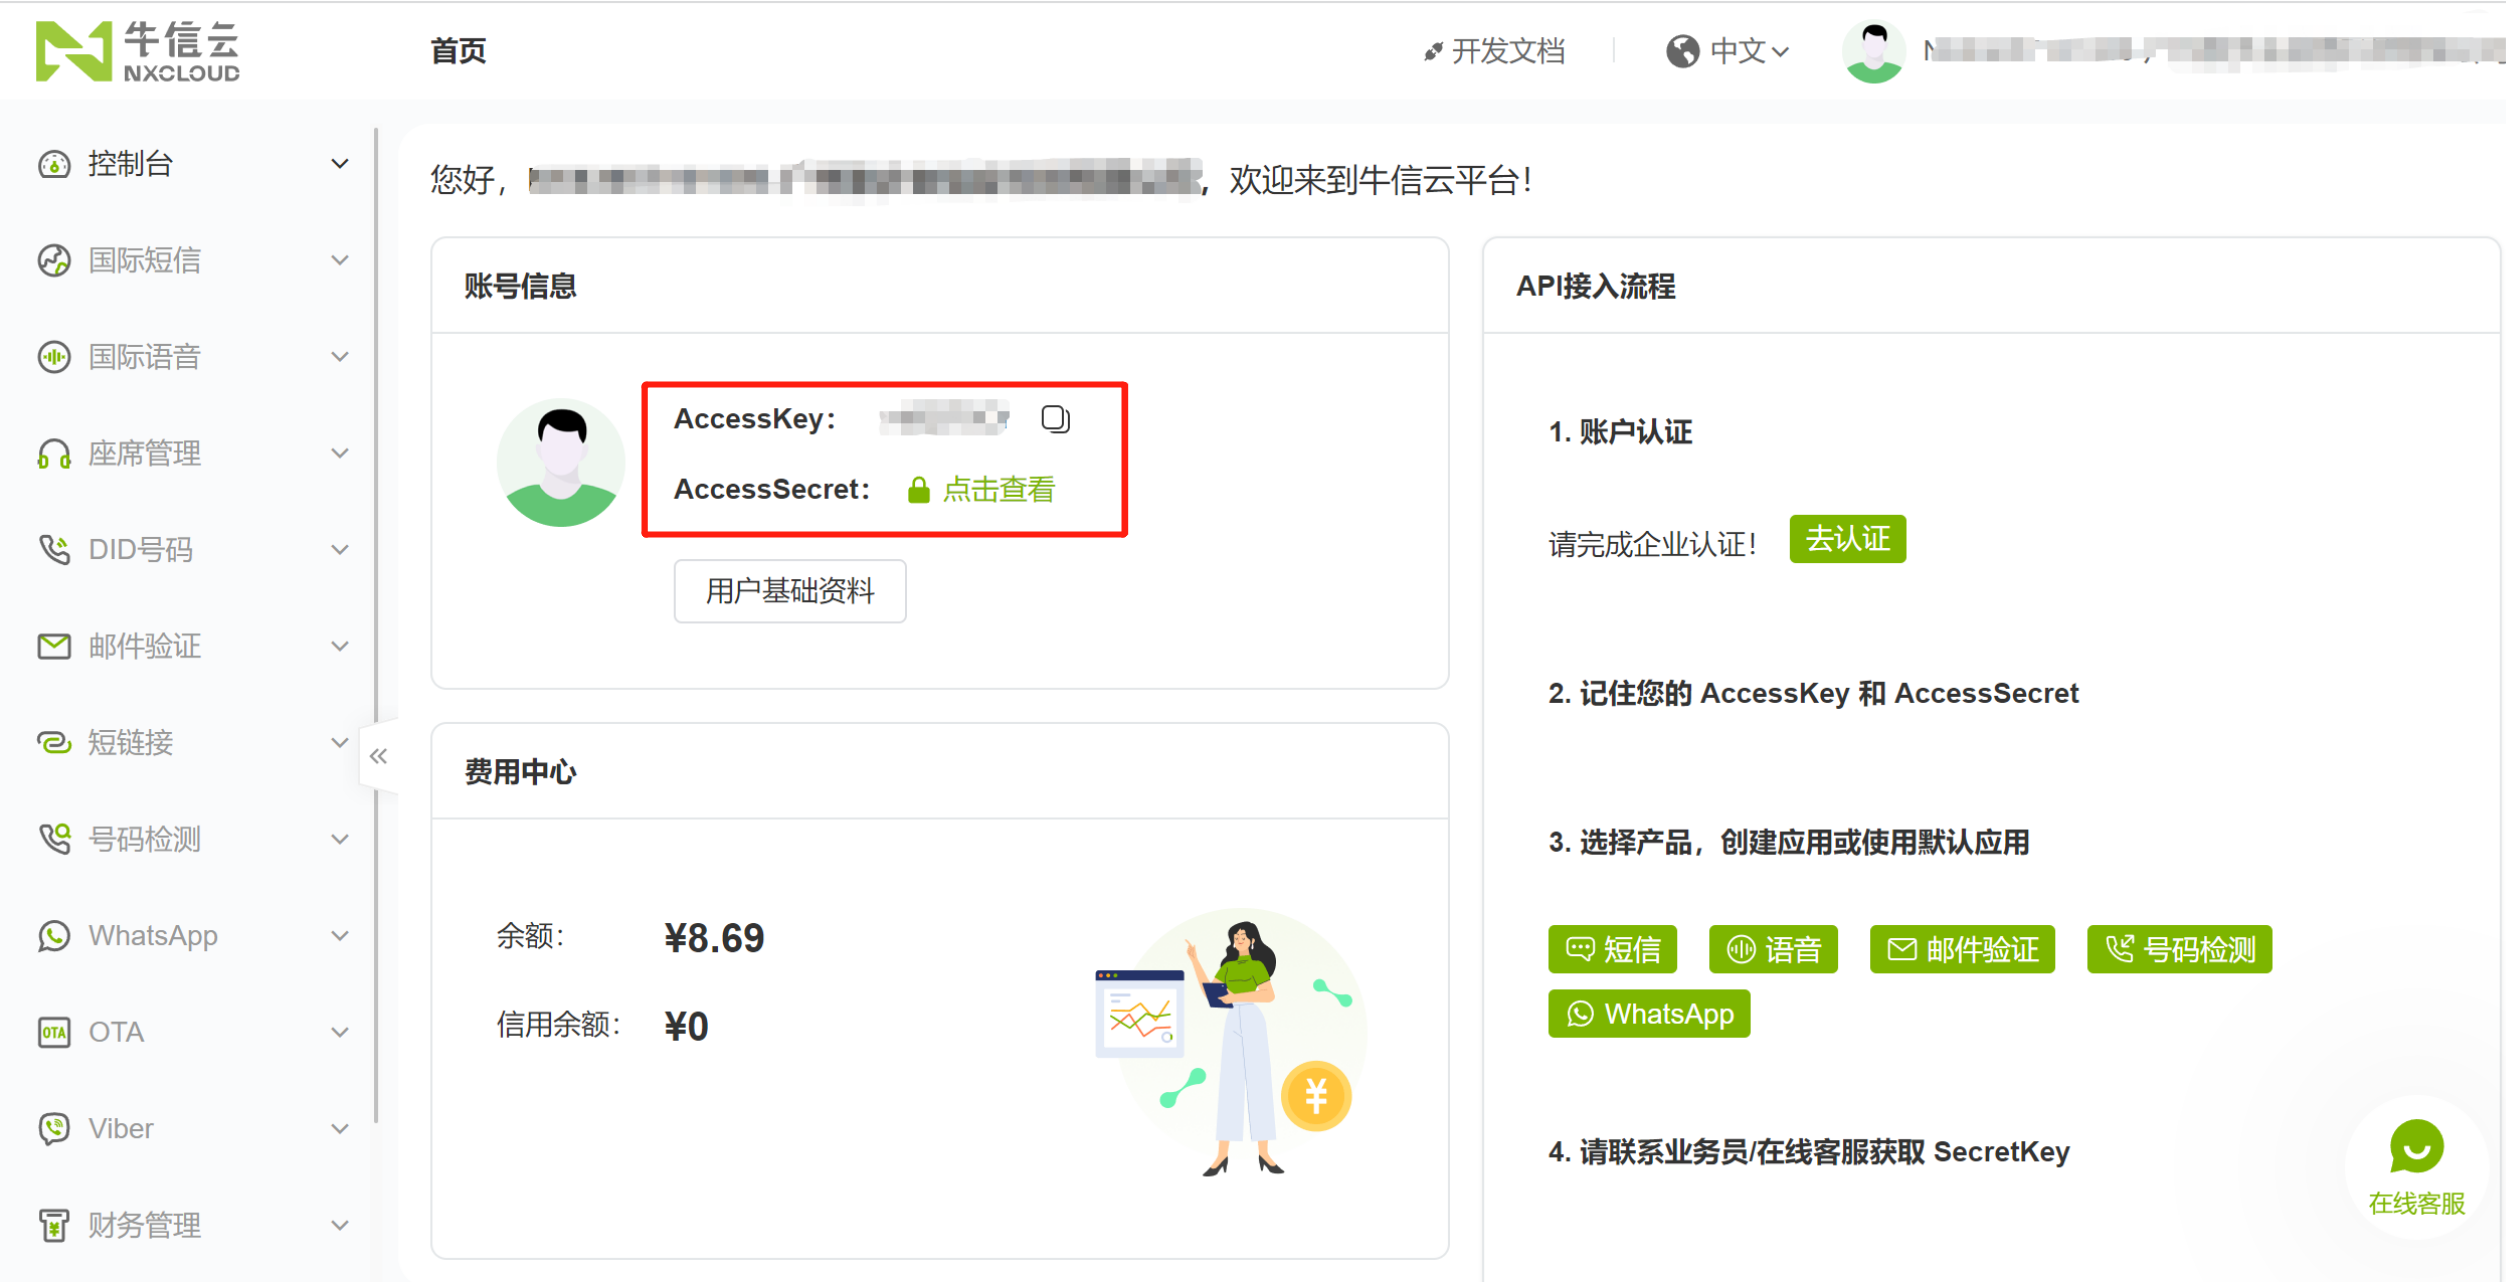
Fill in the SaleSmartly-NxCloud integration pop-up window, as shown below.
2.2.2. Add NxCloud Application
In the NxCloud WhatsApp-Customer Application > click the Add button > fill in the application name (customizable), Webhook, set the status to Enabled, and complete the application addition.
Among them, Webhook is obtained and filled in from the SaleSmartly background.

Get the Webhook in SaleSmartly, as shown below. Copy it and fill it in the new application pop-up window above.

After successfully adding the application, copy the AppKey of the application.
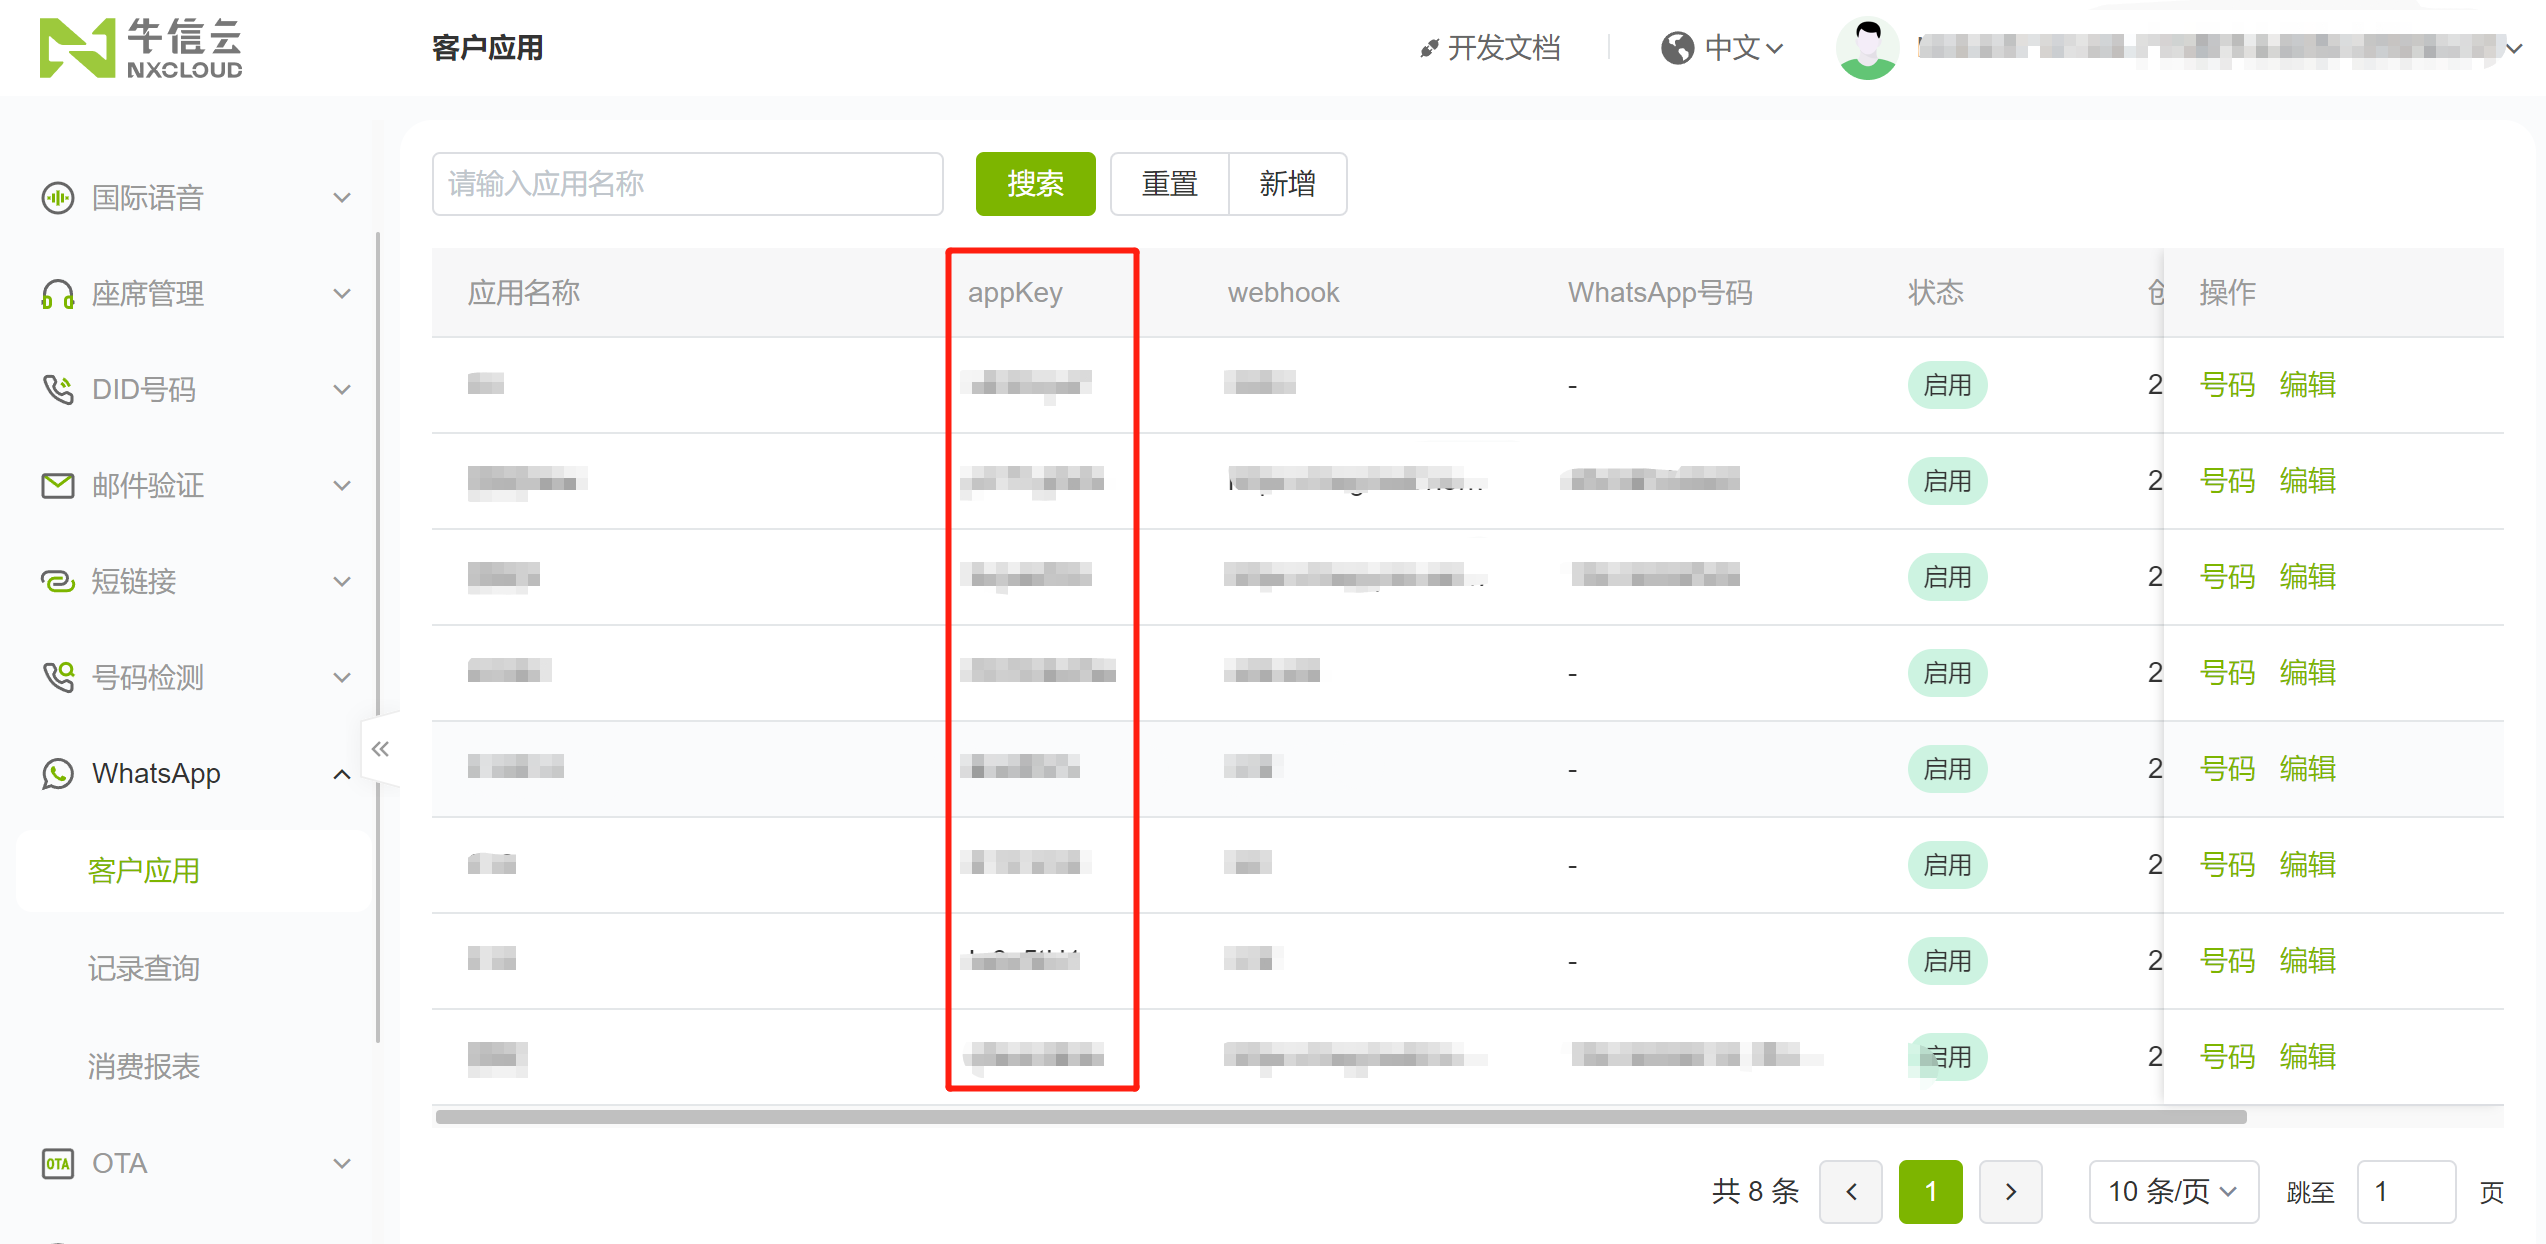
Fill the copied AppKey into the SaleSmartly integration pop-up window. Now all fields have been filled in. Click the OK button to complete the NxCloud access.

2.2.3. Register WABA/Number in NxCloud
In NxCloud, open the WhatsApp-Customer application page and click the list operation item Number to open the number list page, where you can perform embedded registration of Waba/numbers and add message templates.

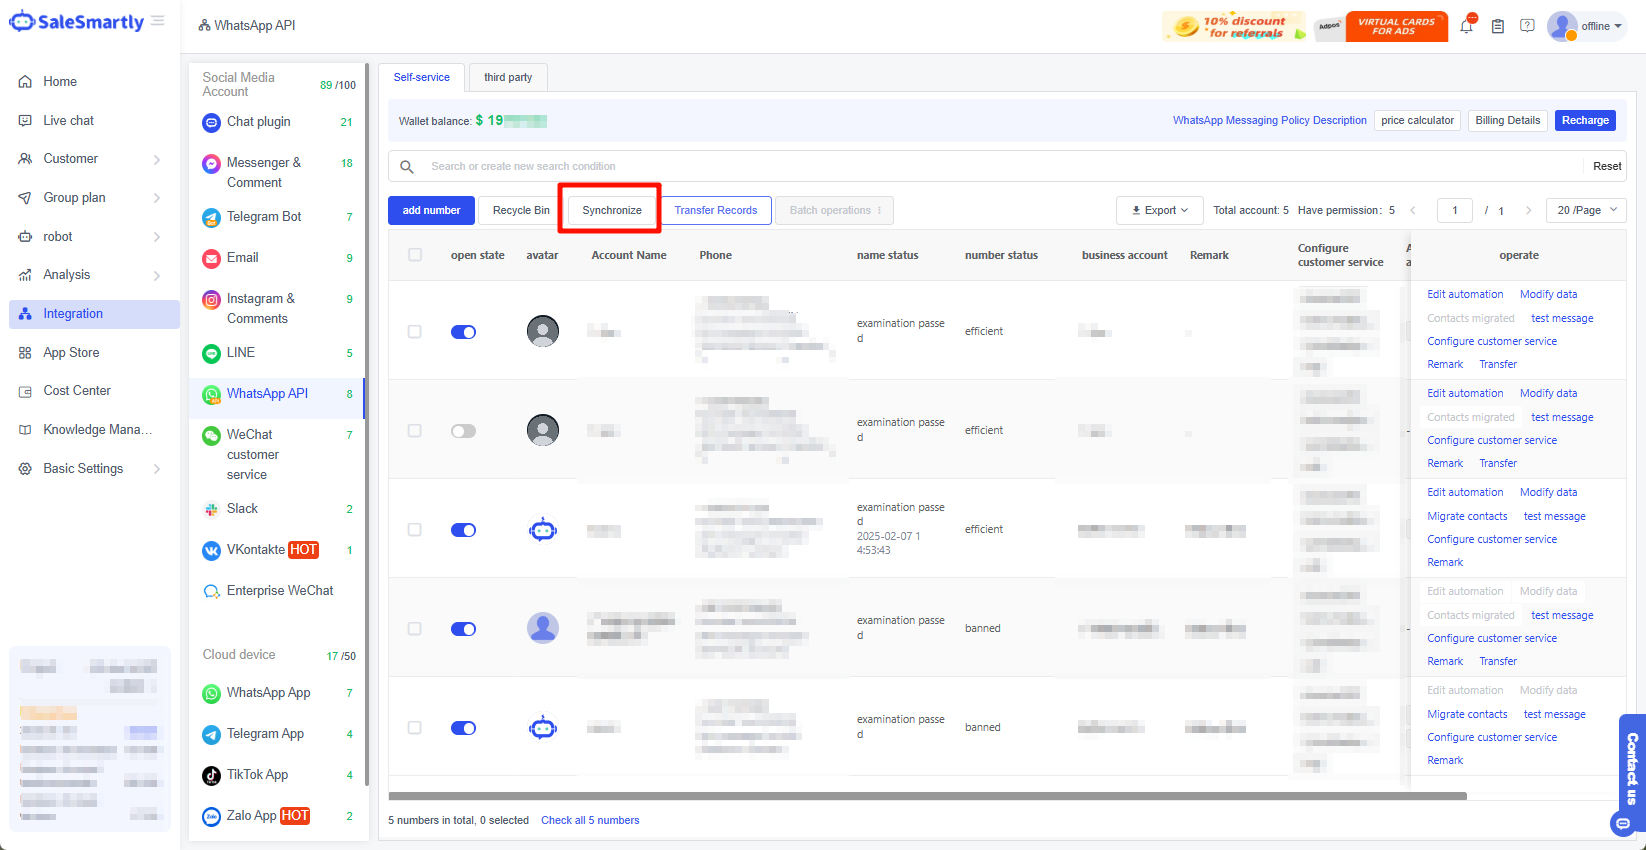
In SaleSmartly, click the Synchronize button to sync the latest Waba/number registered on NxCloud.
3. Integrate ChatApp Business API Number
3.1. Log in to Alibaba Cloud
First, register/log in to the Alibaba Cloud service (note that the account you are logging in to is an enterprise account):
https://chatapp.console.aliyun.com/dychatapp/whatsapp/list

3.2. Click AccessKey Management

3.3. Create User
Click Create User > Fill in user account information > Check OpenAPI call access > Click OK.

3.4. Obtaining the AccessKey ID and AccessKey Secret
Click Copy to copy the AccessKey ID and AccessKey Secret.
Note: You need to save the AccessKey information in time. It can only be copied and obtained when it is created, so you need to save it carefully!

3.5. Authorization
Click Authorization > Add Authorization > Search and fill in the account you just created > Search for Chat in the permissions below > Check Read-only management and Manage ChatApp permissions > Click OK.

Authorization is successful.

3.6. Fill in the Callback Address
- Copy the corresponding callback address.
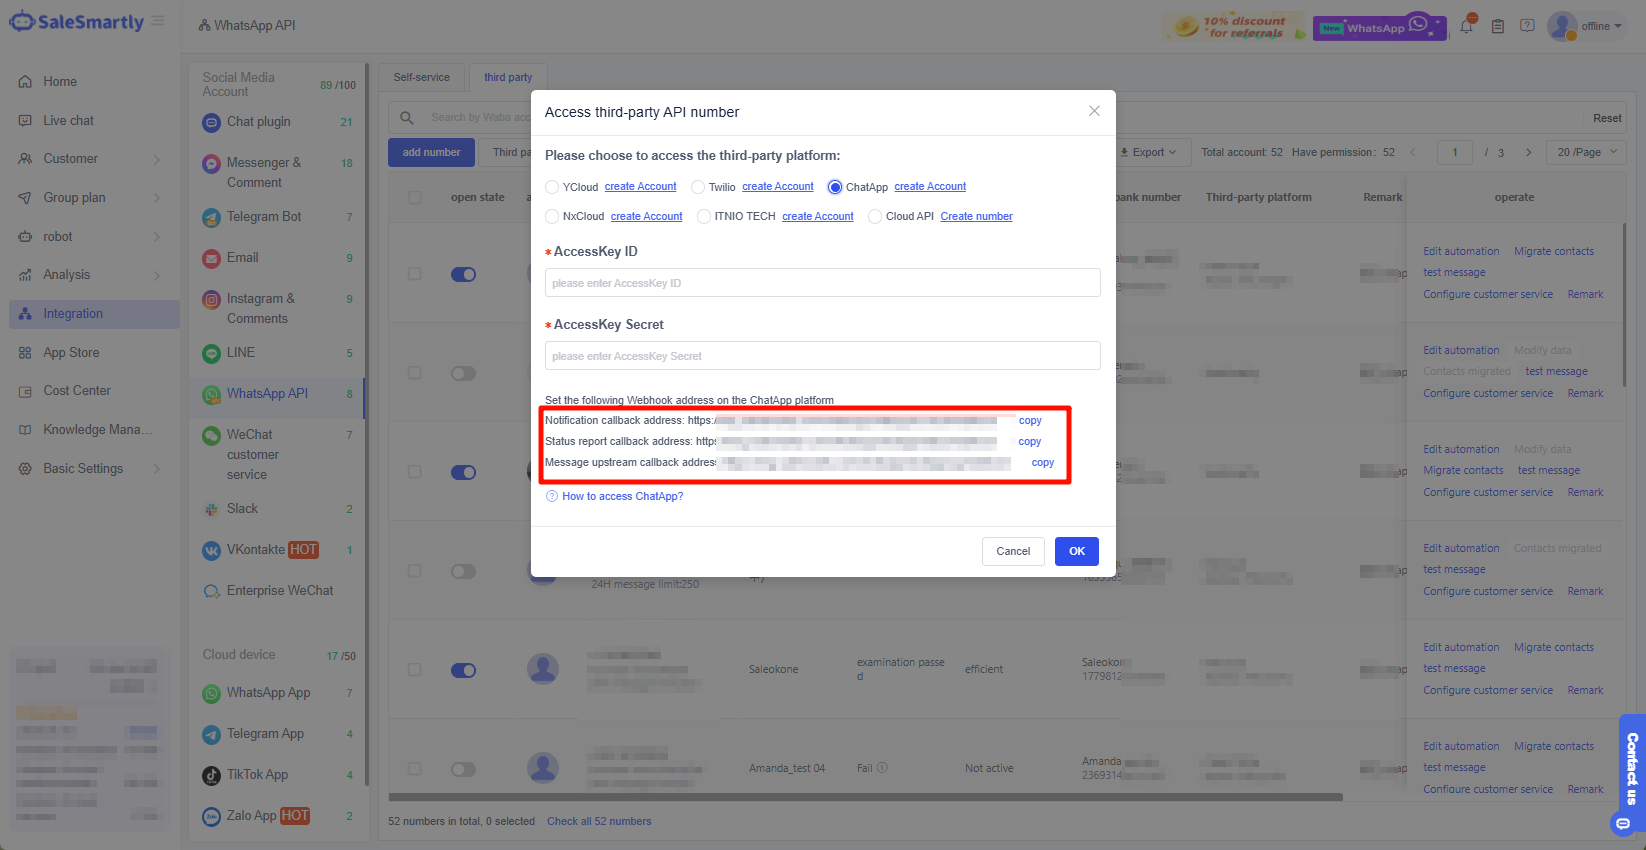
- Enter the Chat message service interface (you can enter this interface through the search above), click Channel Management > Click Channel Webhook Settings > Paste Notification Callback Address > OK.
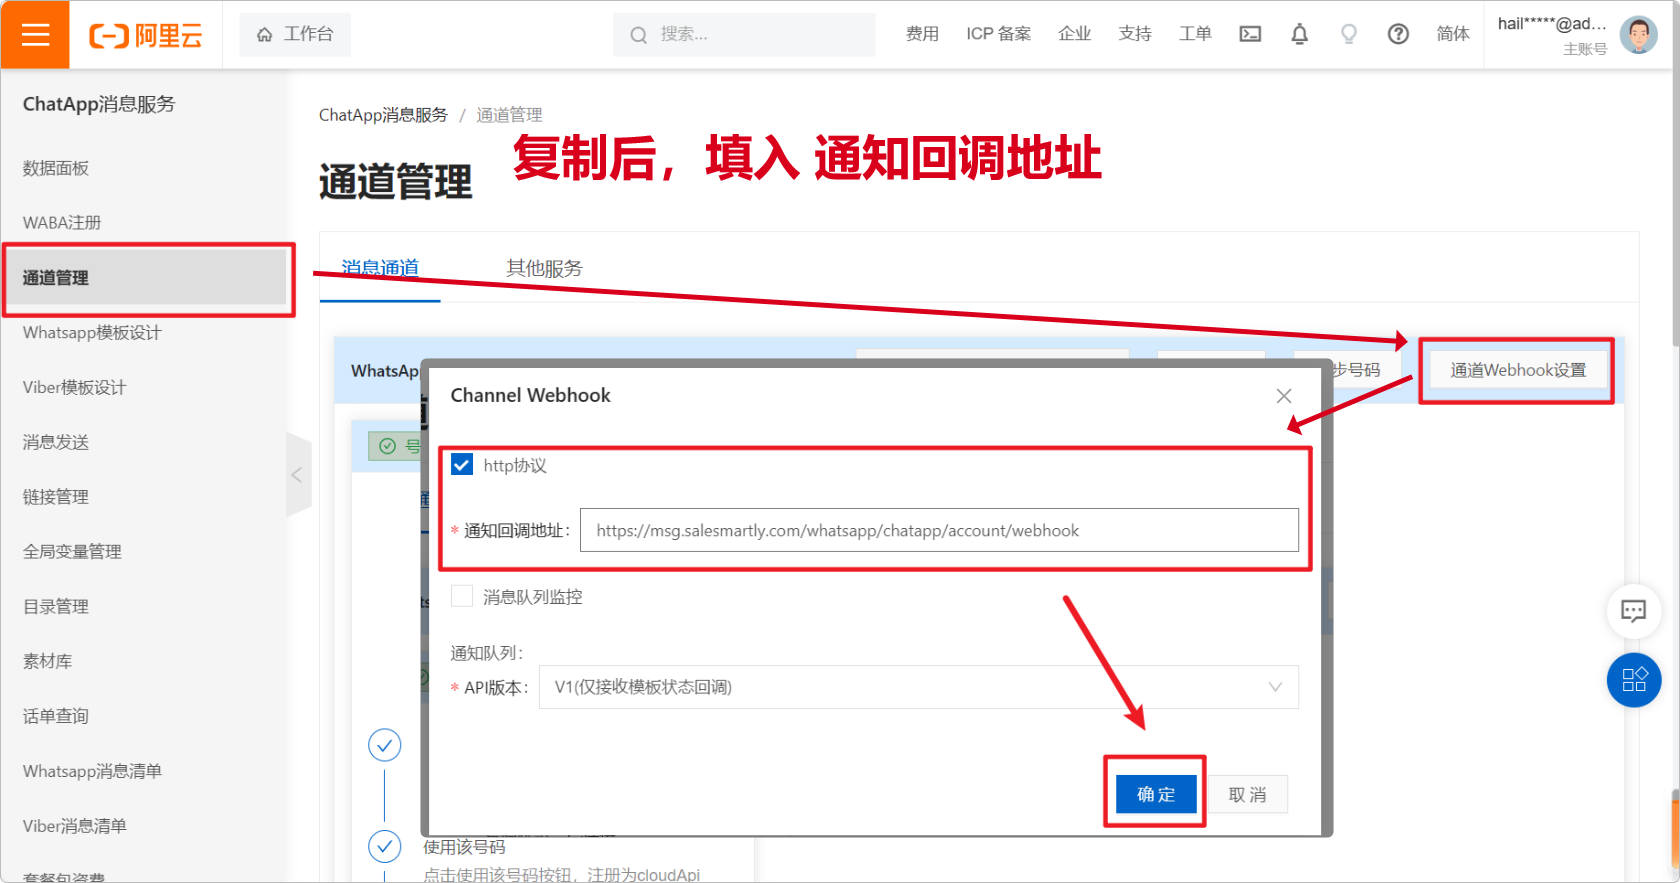
- Click Channel Management > Click Webhook Settings > Paste the status report callback address and message uplink callback address > OK.

3.7. Fill in the Key
Click ChatApp > fill in the AccessKey ID and AccessKey Secret obtained at the beginning > click OK, and the configuration is successful.

4. Integrate ITNIO TECH Business API Number
Please register with ITNIO TECH first, fill in the corresponding information, and then add WABA/number through ITNIO TECH, which can be synchronized to SaleSmartly.
4.1. Fill in the Registration Form and Log in to ITNIO TECH
First register/log in to ITNIO TECH service:
https://www.itniotech.cn/

4.2. Get API Key and API Secret
After successful login, you can get the API Key and API Secret on the homepage, click Copy, return to the integration interface and paste them to the corresponding location.
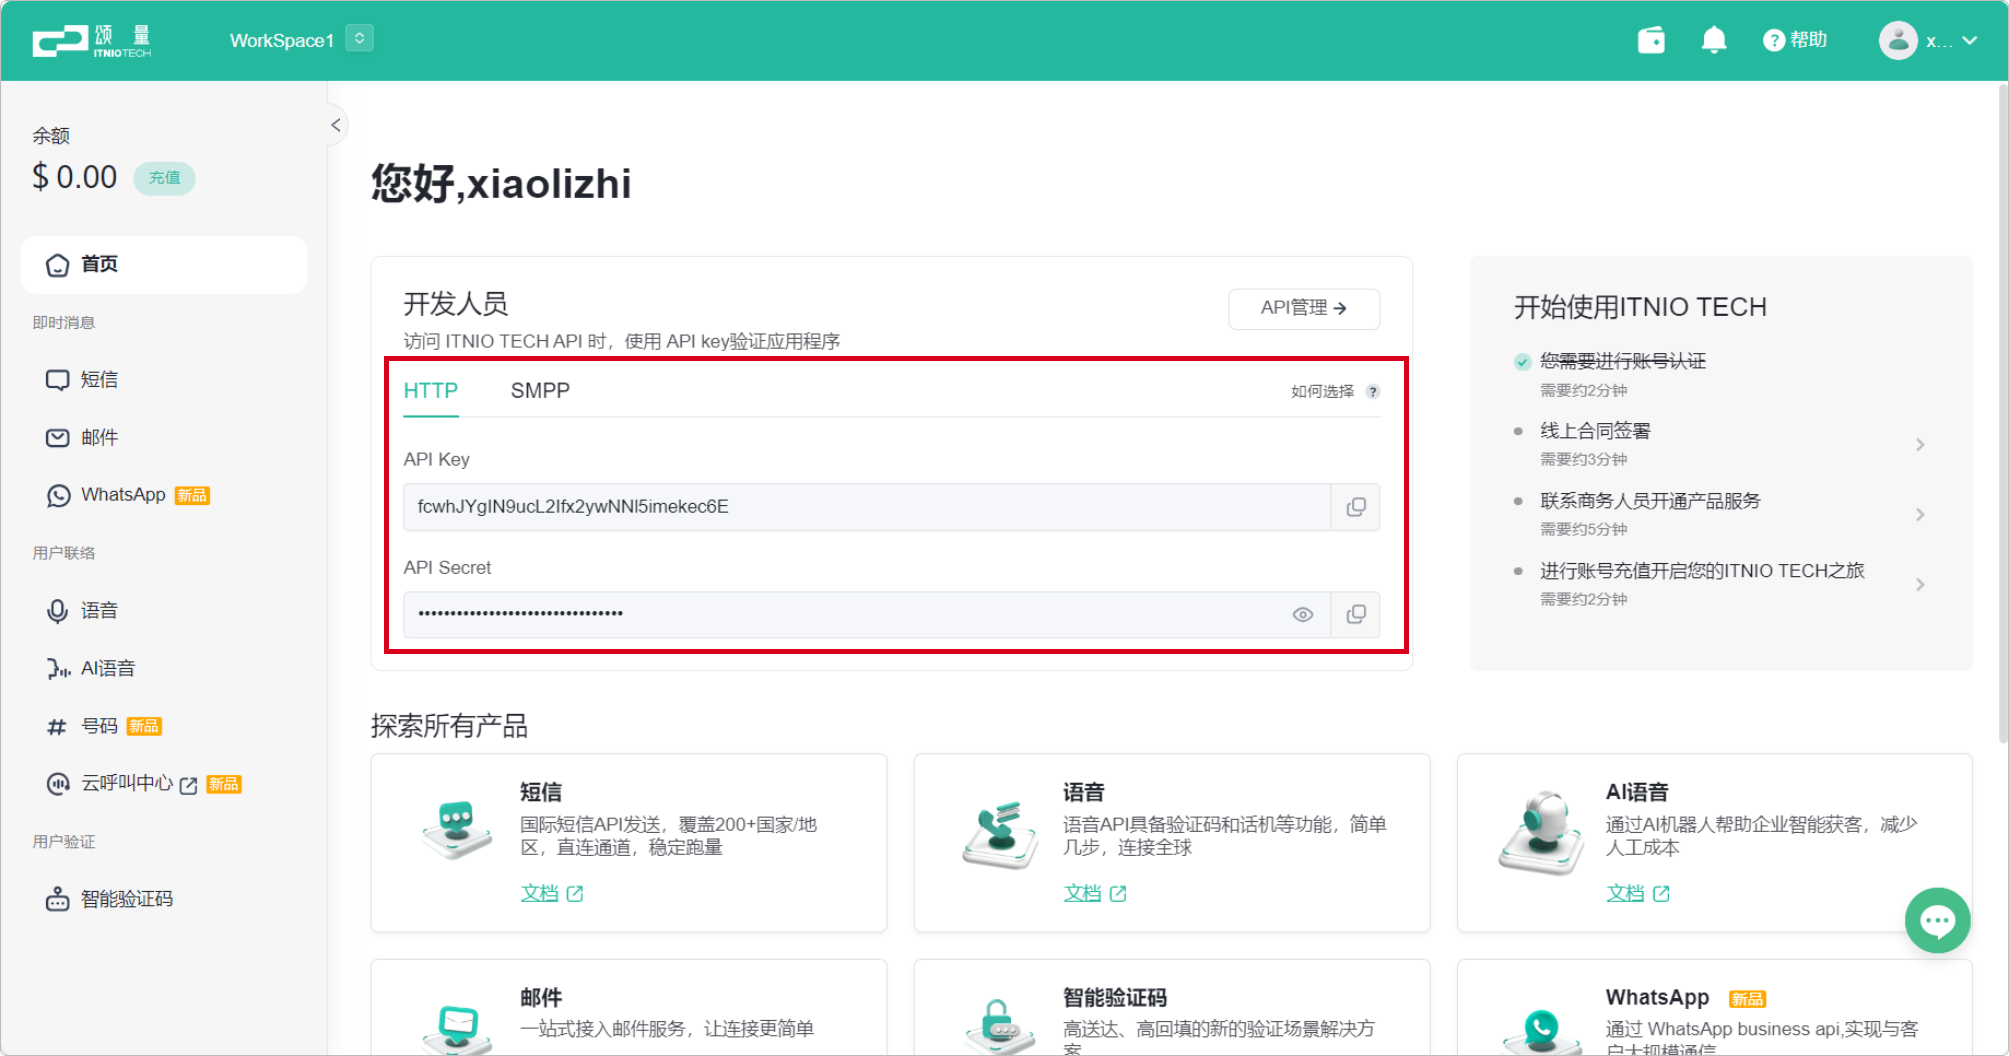
Return to the integration and paste it into the corresponding position.
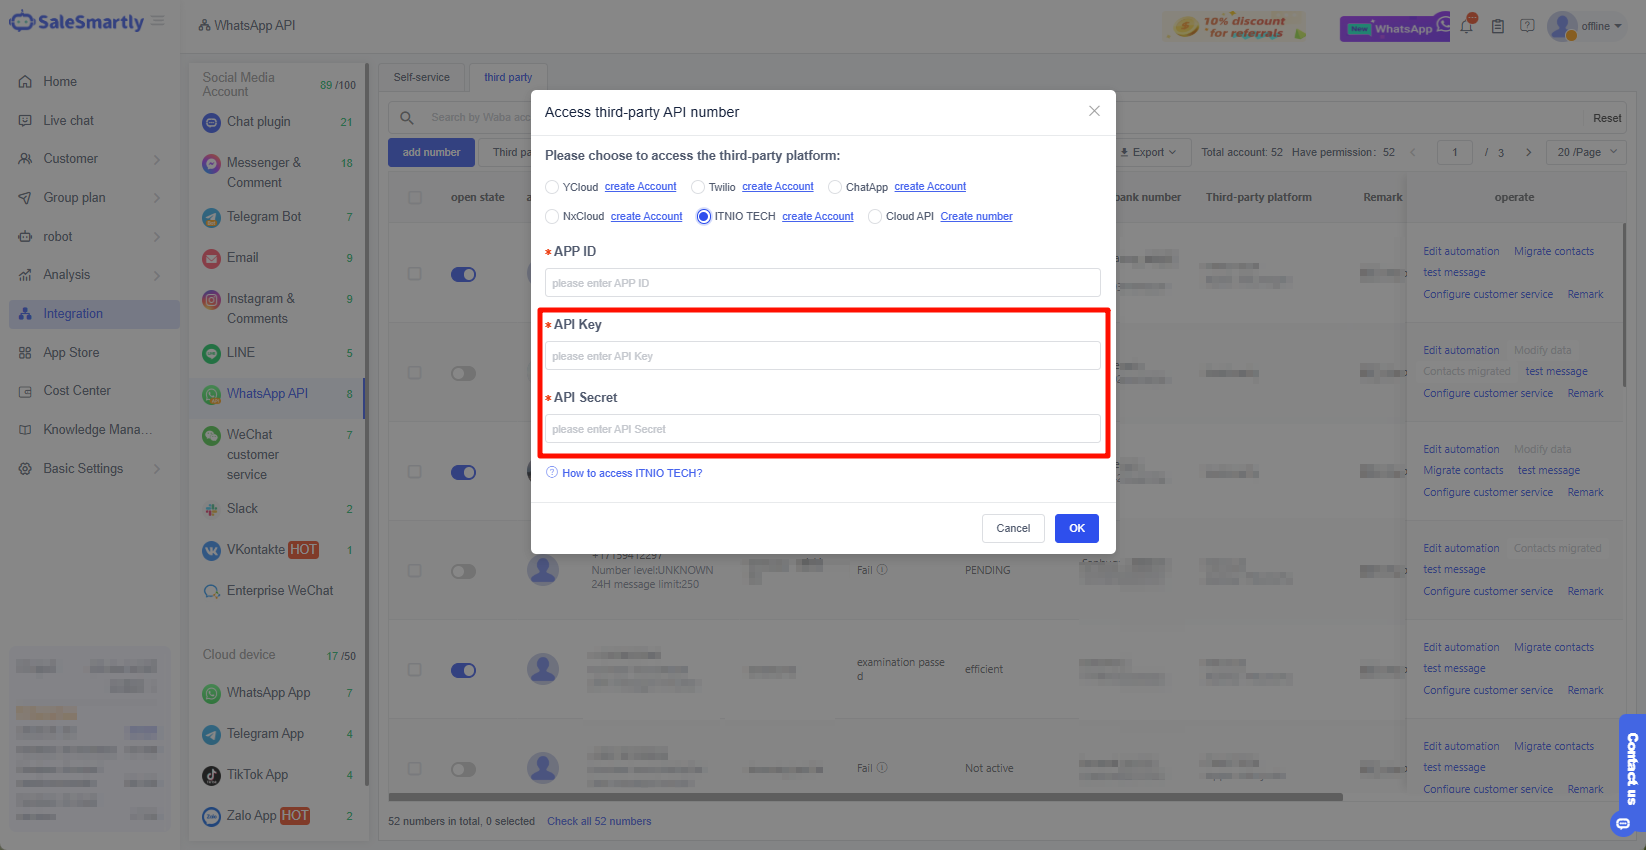
4.3. Get APP ID
To obtain the AppID, you need to register a WhatsApp account. If your ITNIO TECH account has already registered a WhatsApp account, you can skip this step.
Click WhatsApp on the left > Click WhatsApp account after entering > Click Register WhatsApp account and follow the process to complete the account registration.
Note: Real-name authentication is required to register a WhatsApp account.

After registration is complete, you can obtain the App ID, copy and paste it to the corresponding location, click OK, and the integration will be successful.