Connect Cloud API
1. Connecting WhatsApp Cloud API to SaleSmartly System
This article explains how to connect your WhatsApp Cloud API number to the SaleSmartly system. If you haven't created a WhatsApp Cloud API number yet, please refer to: Facebook Tutorial on Creating a WhatsApp Cloud API Number – SaleSmartly Help Center
1.1. Create an Application
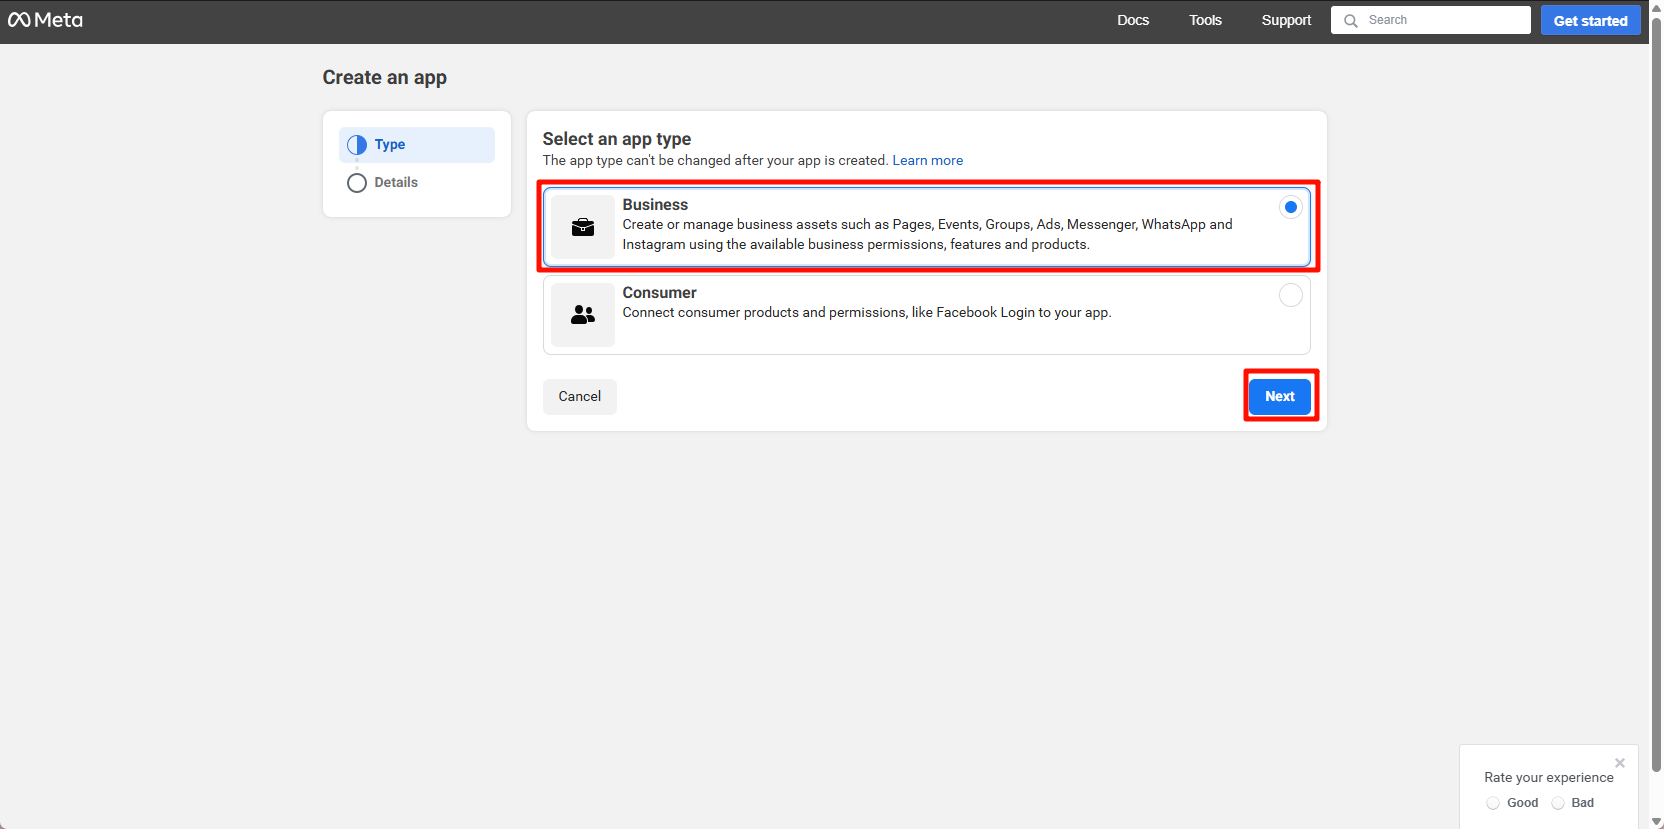
Open the Meta developer dashboard. Select the "Business" type and create an app.
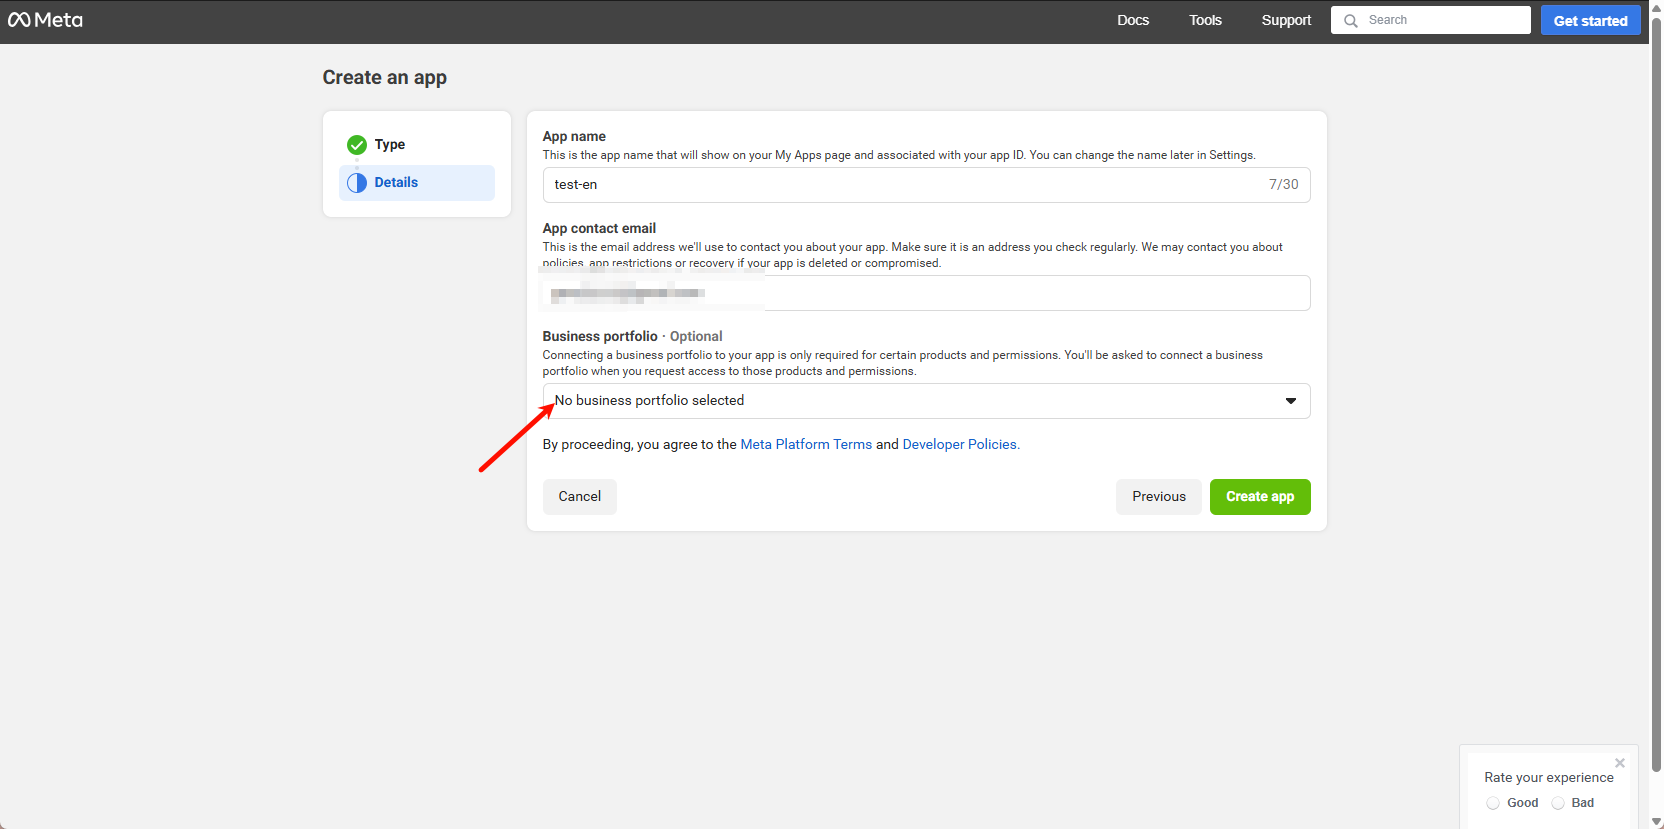
Fill in App Name and App Contact Email, then click Create App

Business Management Platform Account - Select the BM number to be bound. One application can be bound to one BM number. The WABA account and number under the BM number will be synchronized to the SaleSmartly dashboard for chat integration and management.
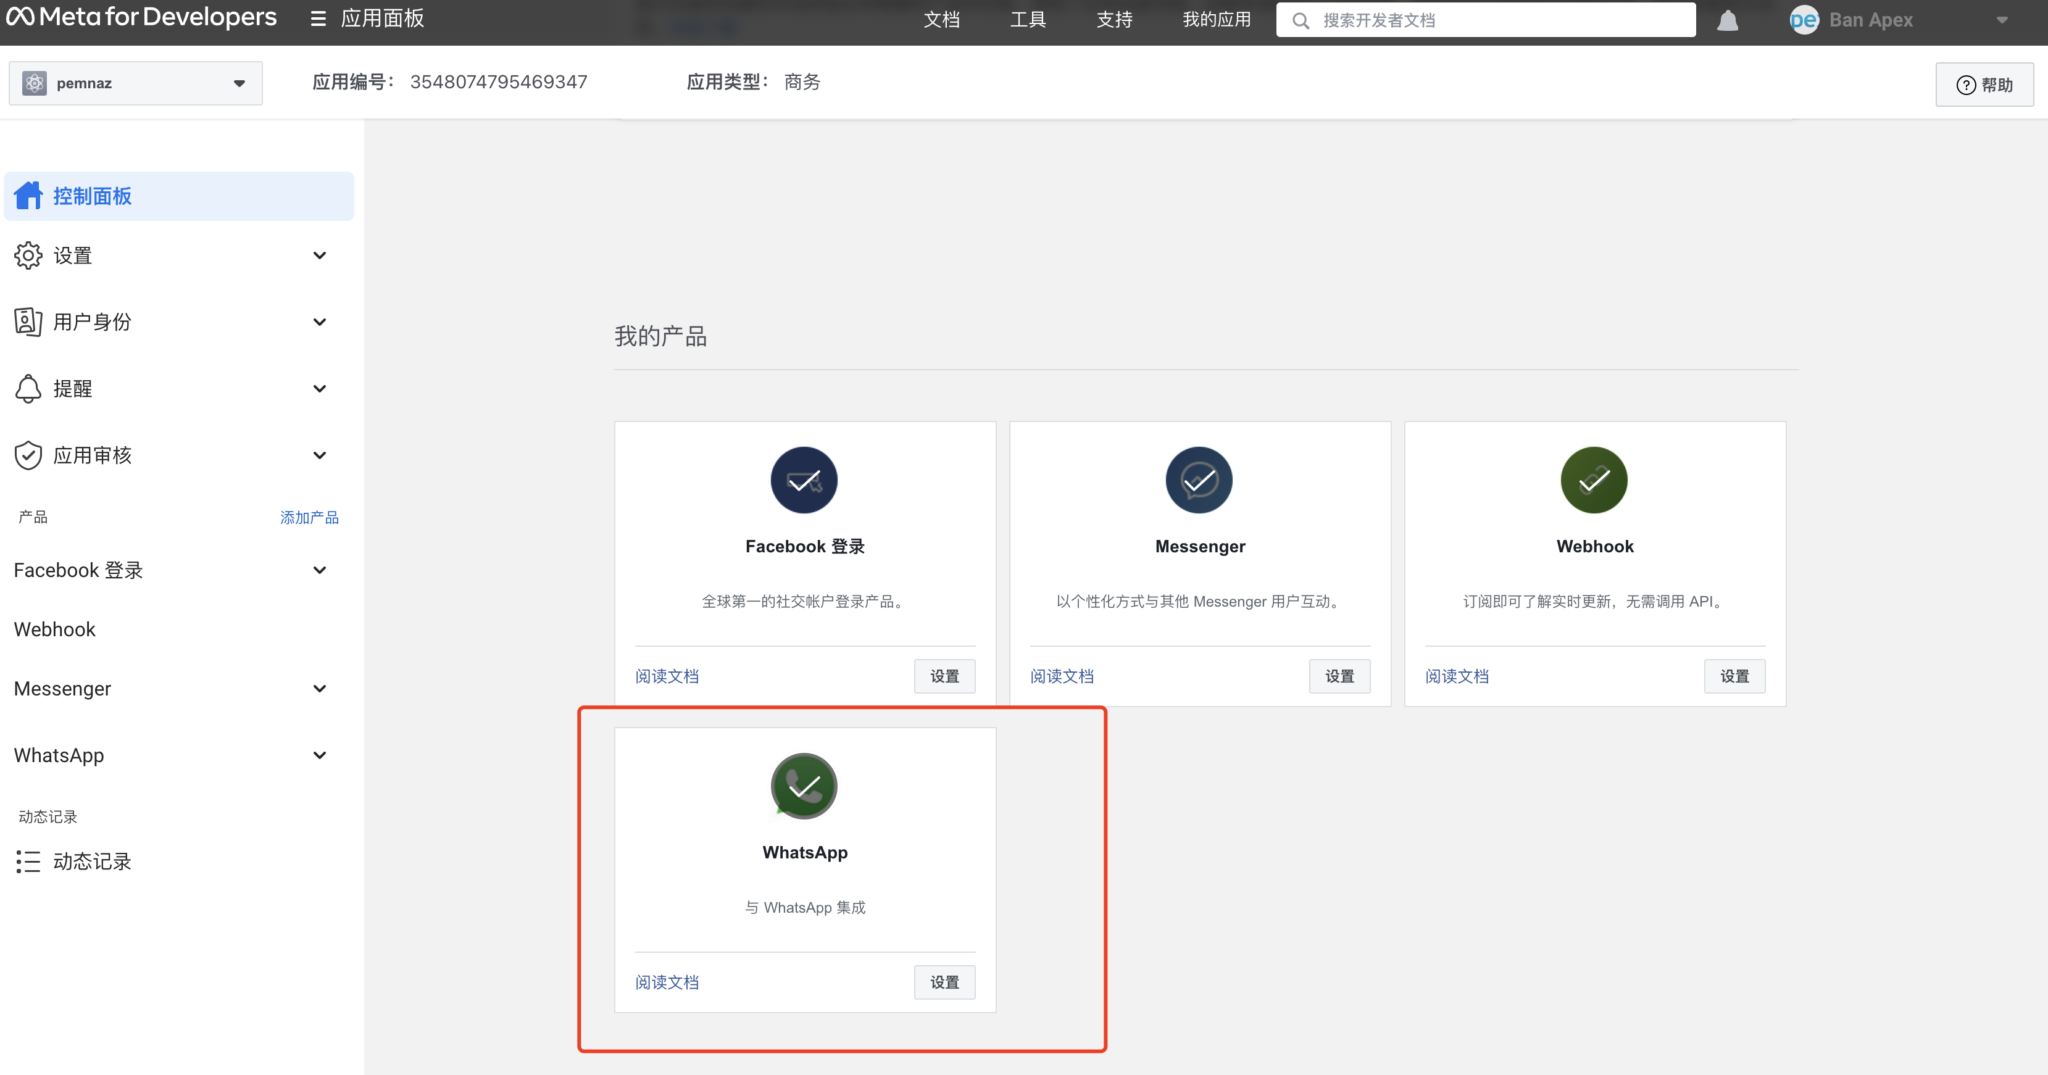
After creation, under the application-control panel, select the WhatsApp product and click Settings.
Note: Official restrictions require that only FB developers registered with FB accounts using overseas numbers can see and use WhatsApp Cloud API products (restricted in China).
1.2. Get Application Information
In Settings > Basic, open the basic information of the application you created and obtain:
- Application number
- Application key
- BM ID
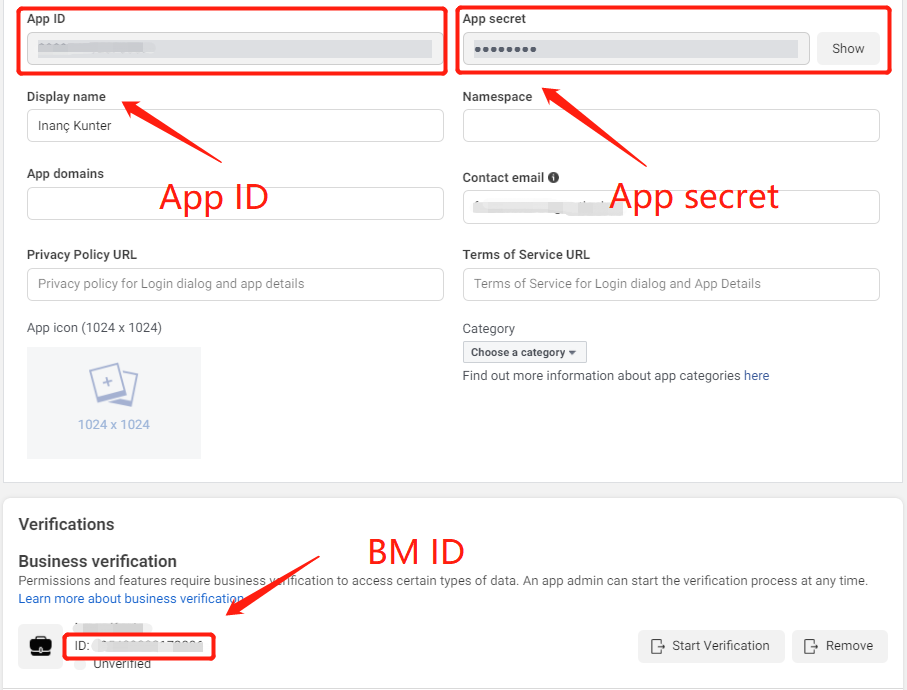
Fill these details into the SaleSmartly dashboard > Application Configuration:
- "AppId"
- "Secret"
- "Bind BM number Id"
1.3. Add User Permissions in BM
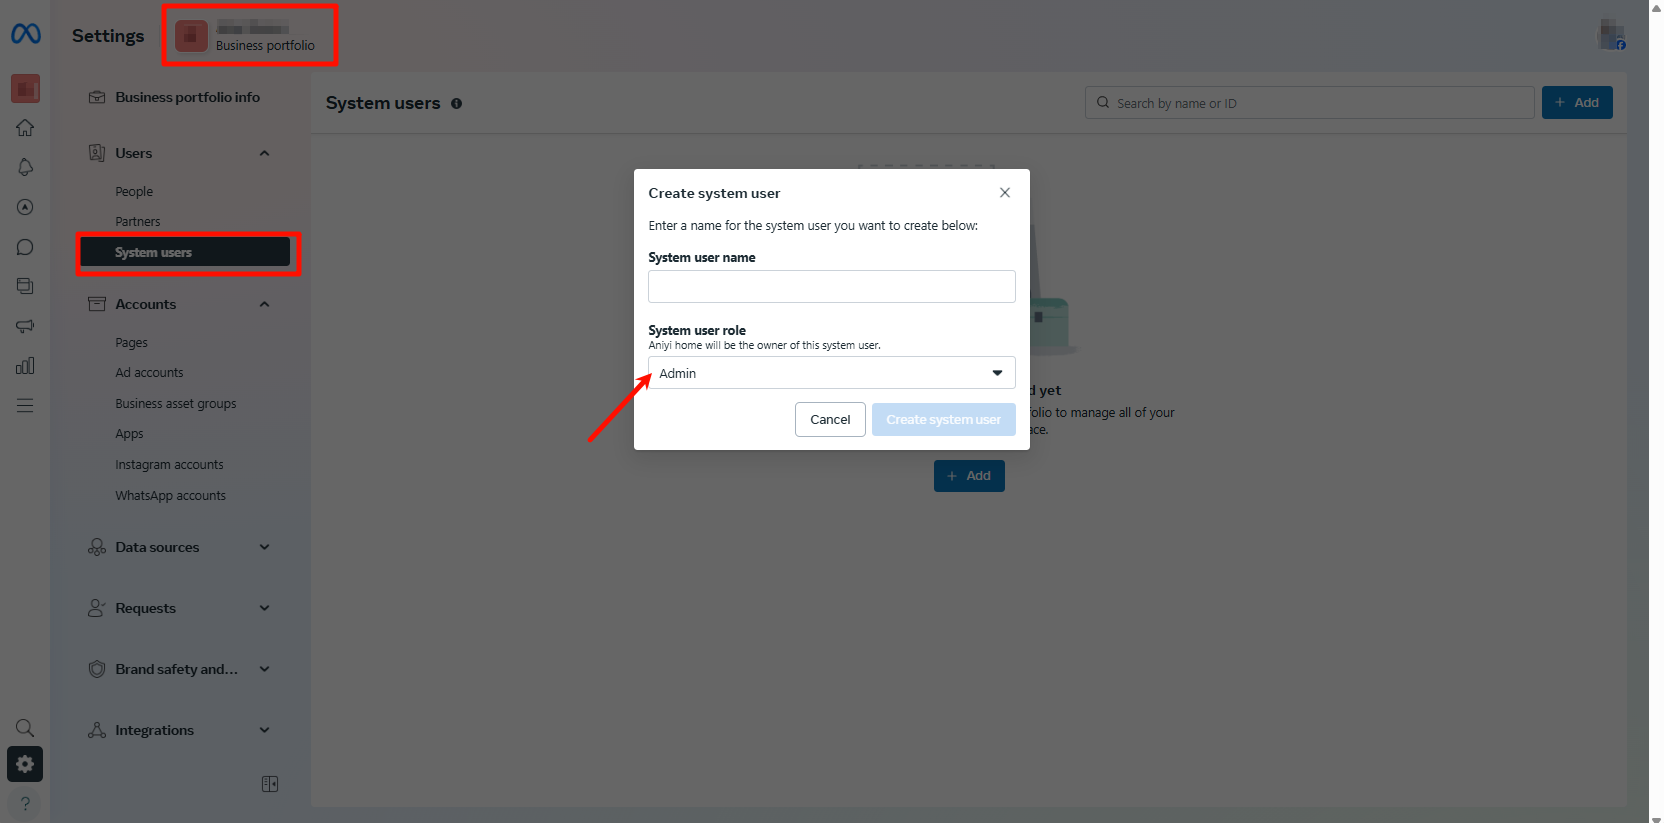
- Open the FB business dashboard
- Under your bound BM, click System User > Add
- Select "Administrator" identity
- Click "Create System User"
If you can't create an Administrator, see the "Create Staff" method below.
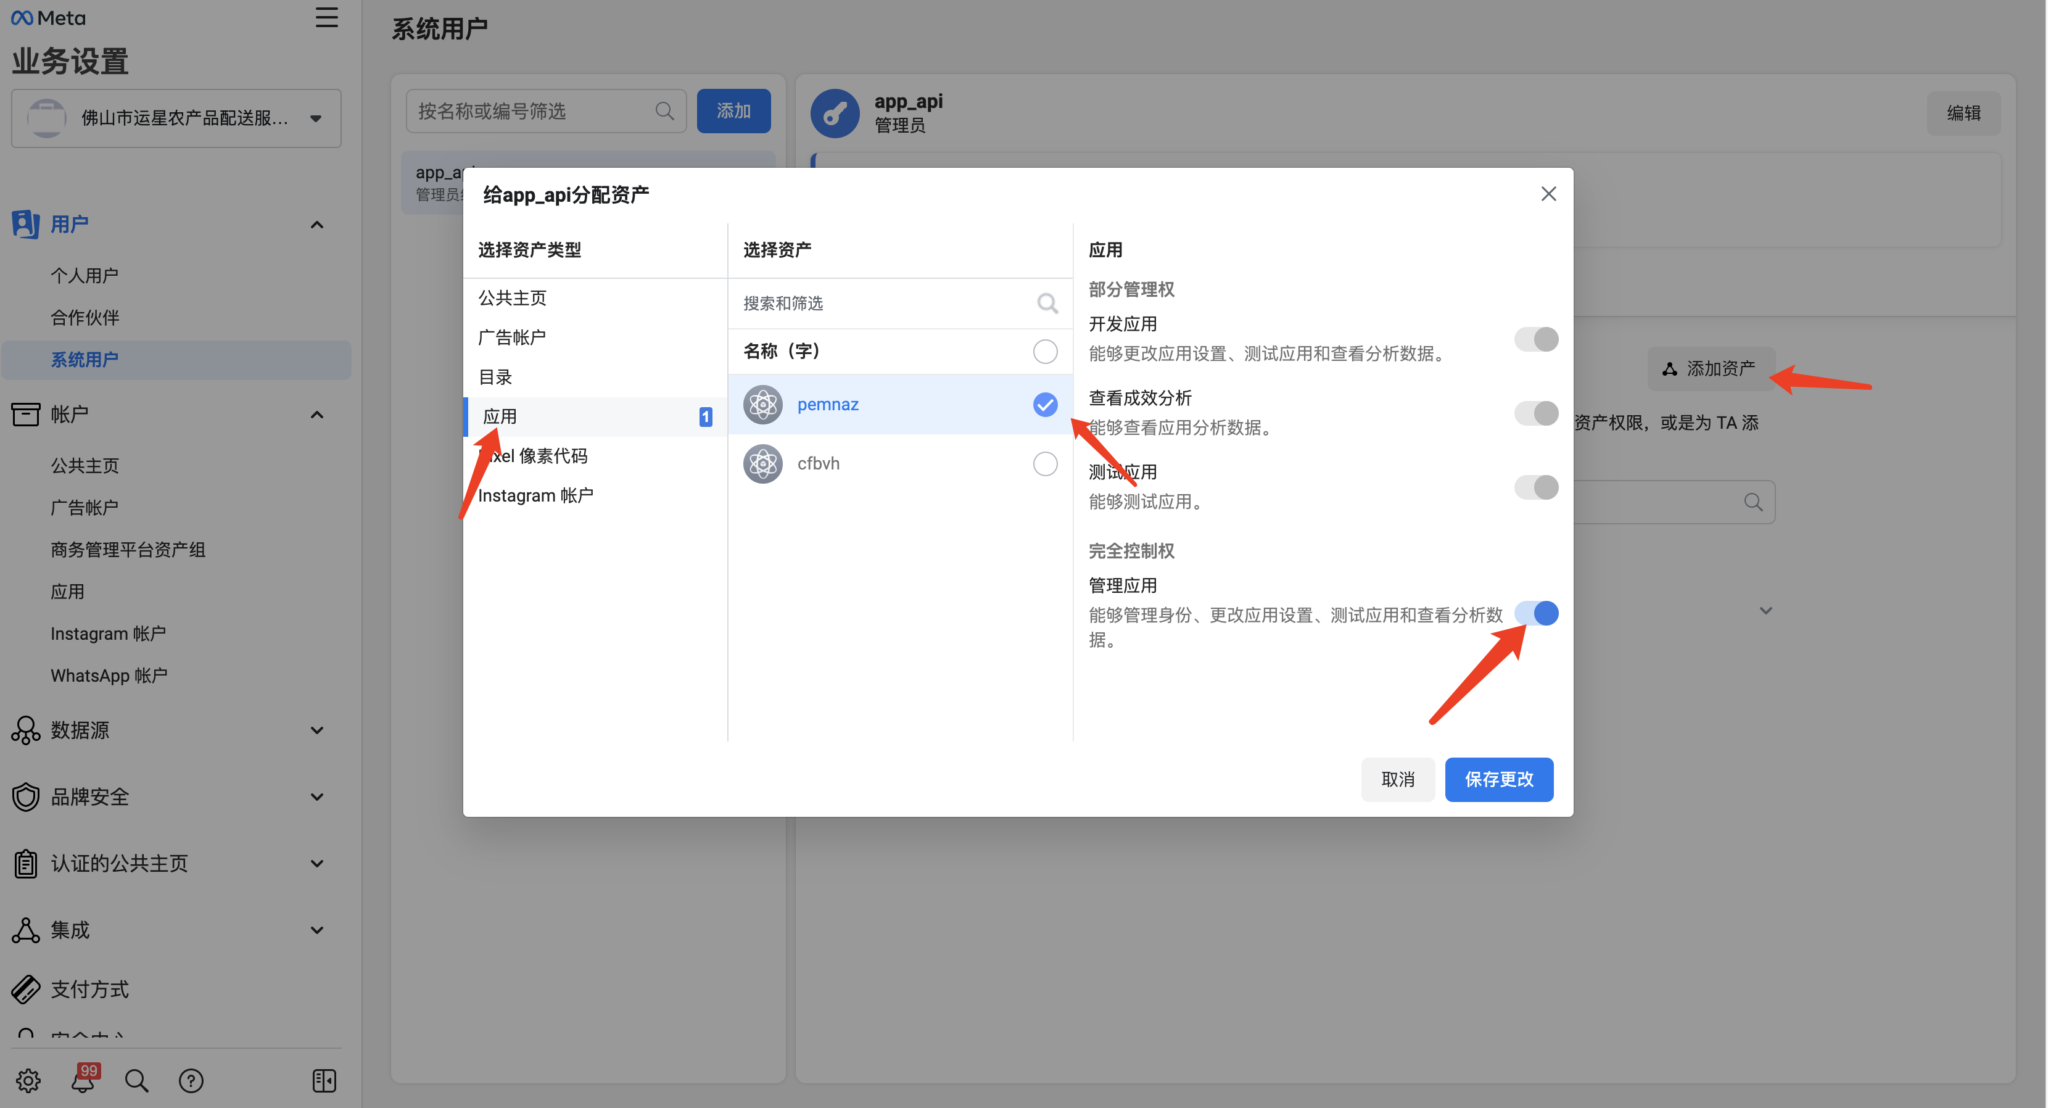
Click the newly added system user, open the user details panel, and click "Add Asset".
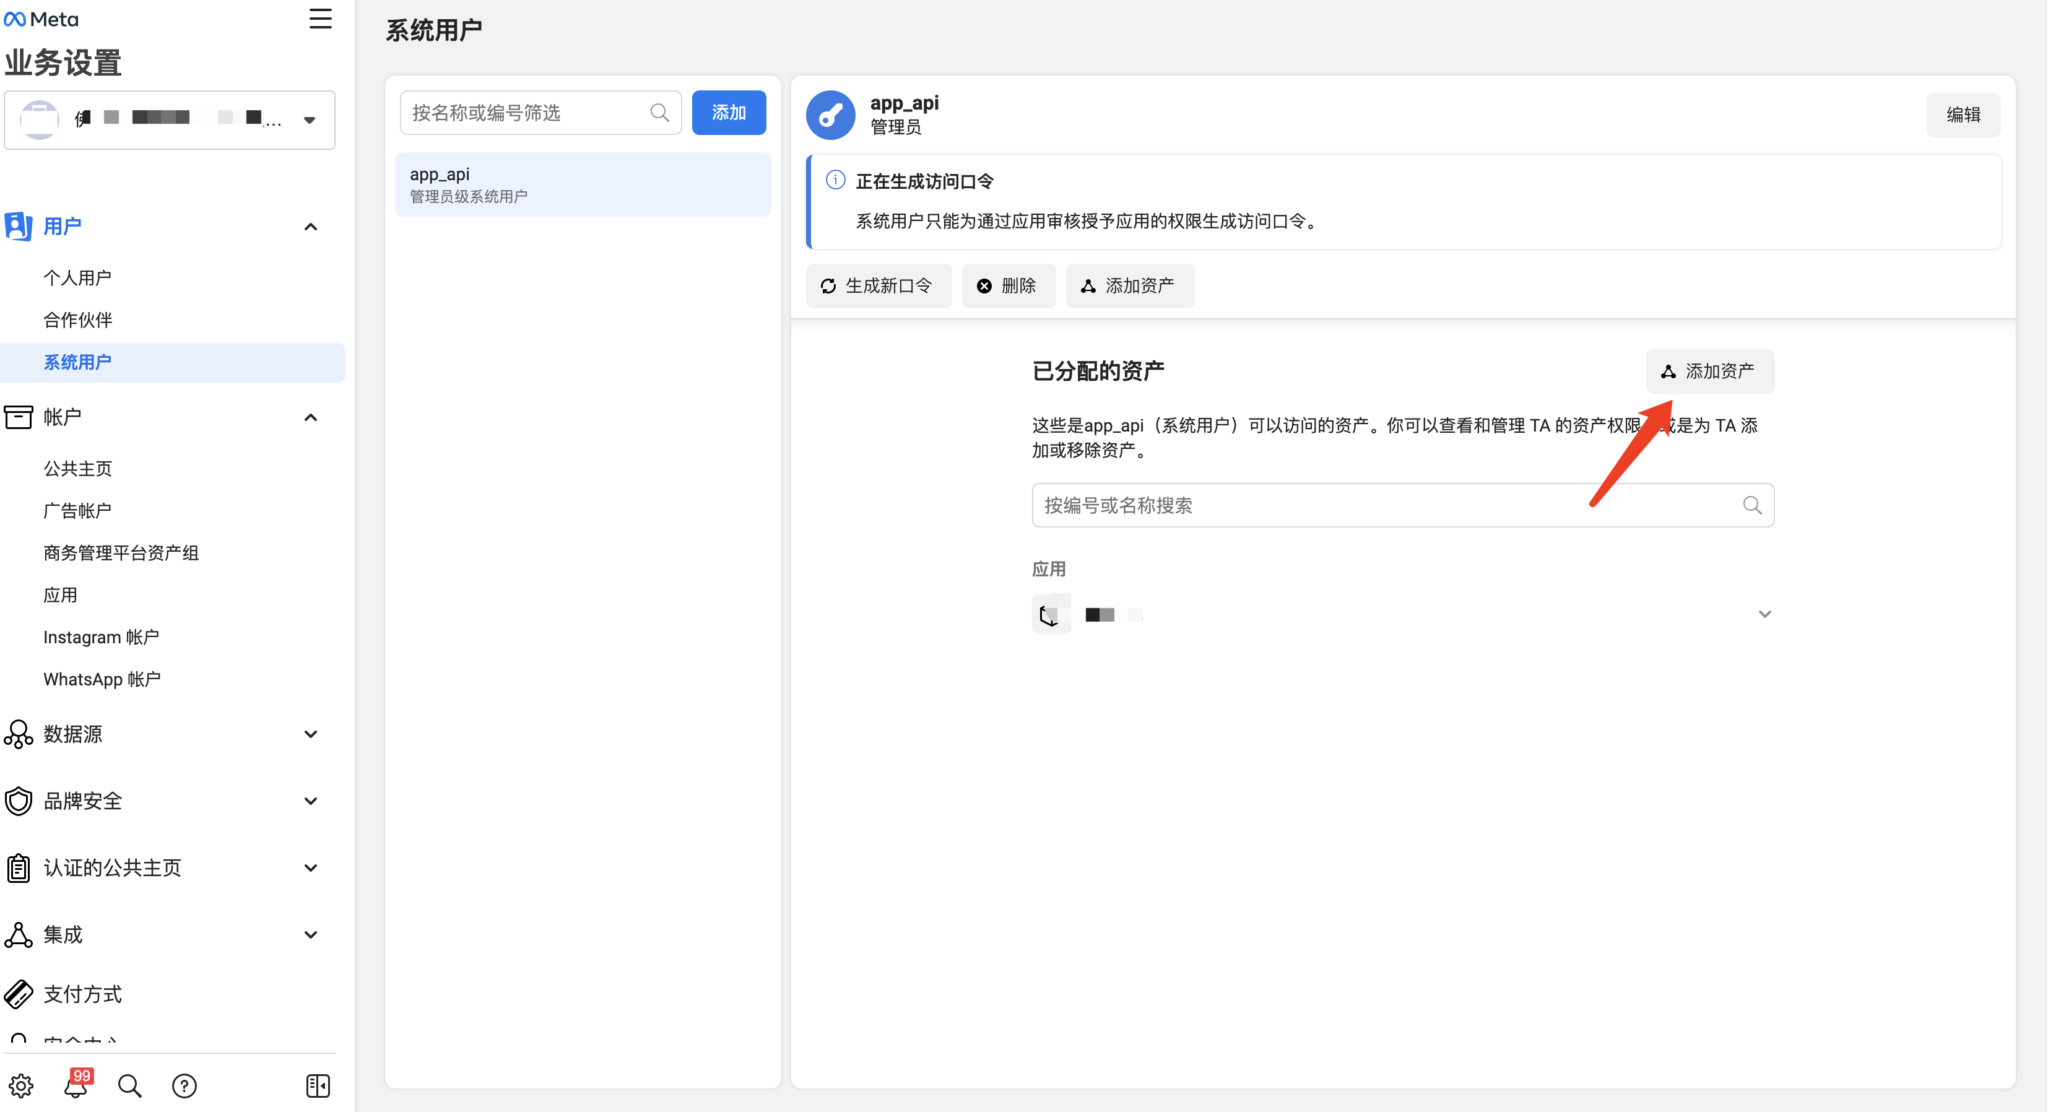
In the popup window:
- Select your created application under "Select Assets"
- Enable "Manage Applications" permission
- Click "Save Changes"
Important: You must assign assets to the system user-administrator (the corresponding Cloud API application).
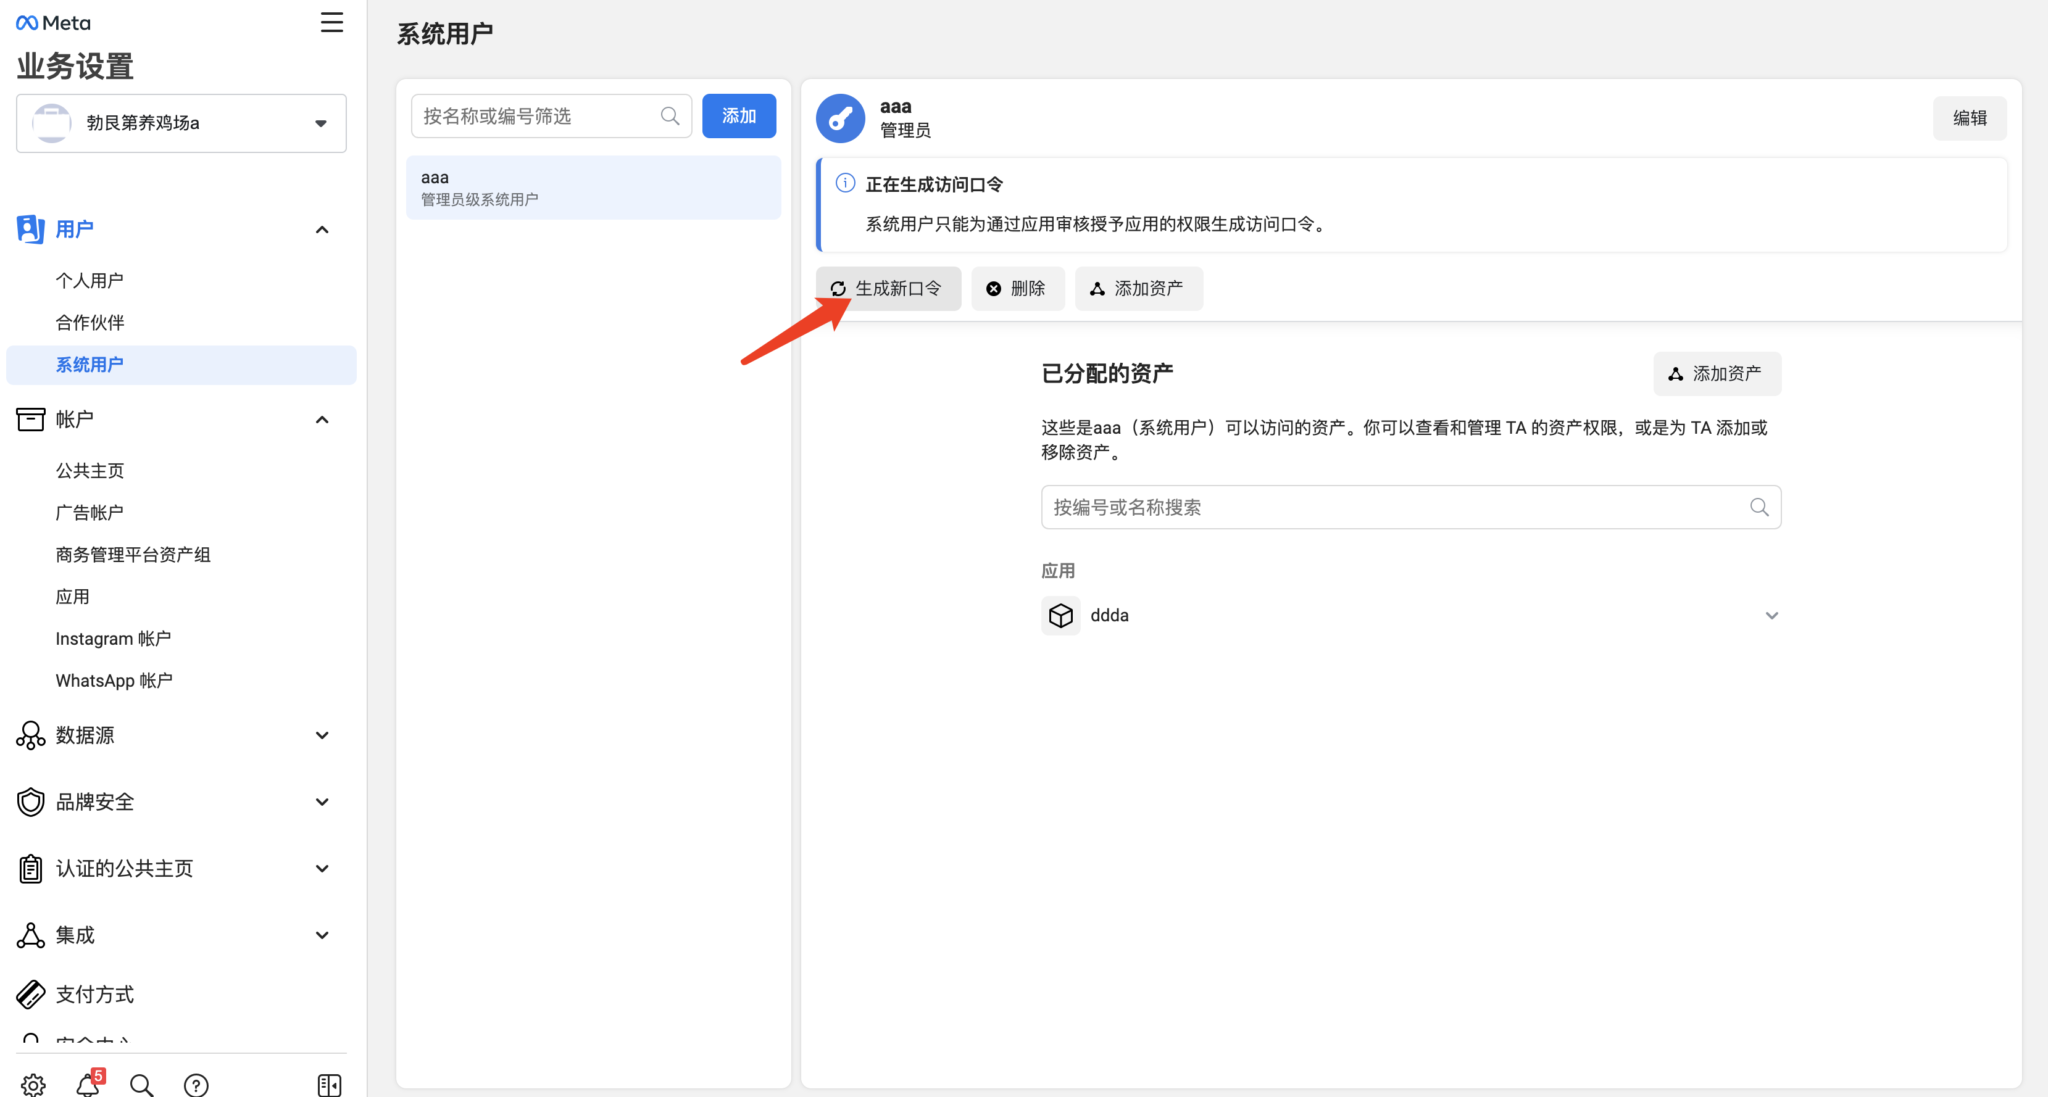
Alternative: Create Staff System User
If Facebook BM won't let you create an administrator system user:

After creation, authorize all permissions in the WhatsApp account to use it with staff permissions.

Click "Generate New Password" button.
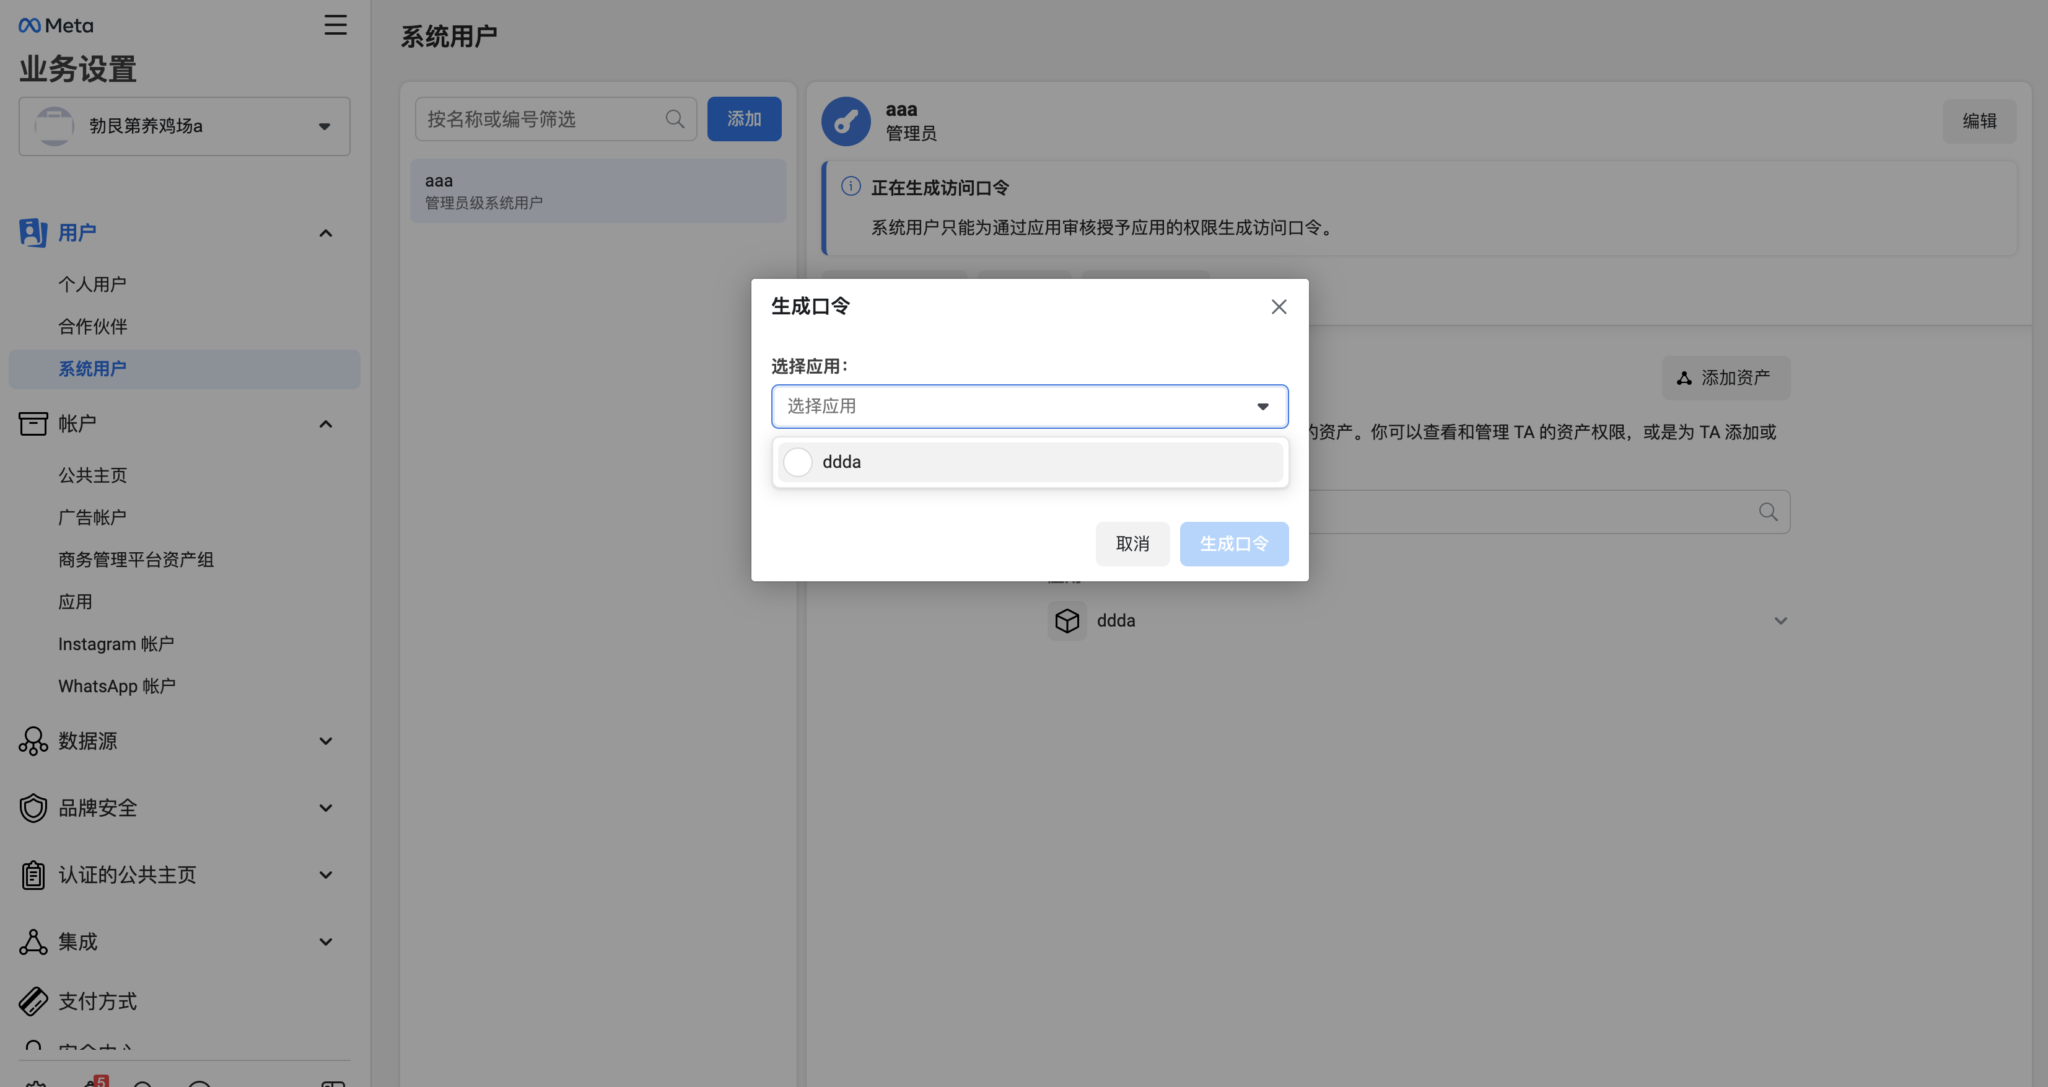
- Select Application
- Check your created application
- Click Generate Token
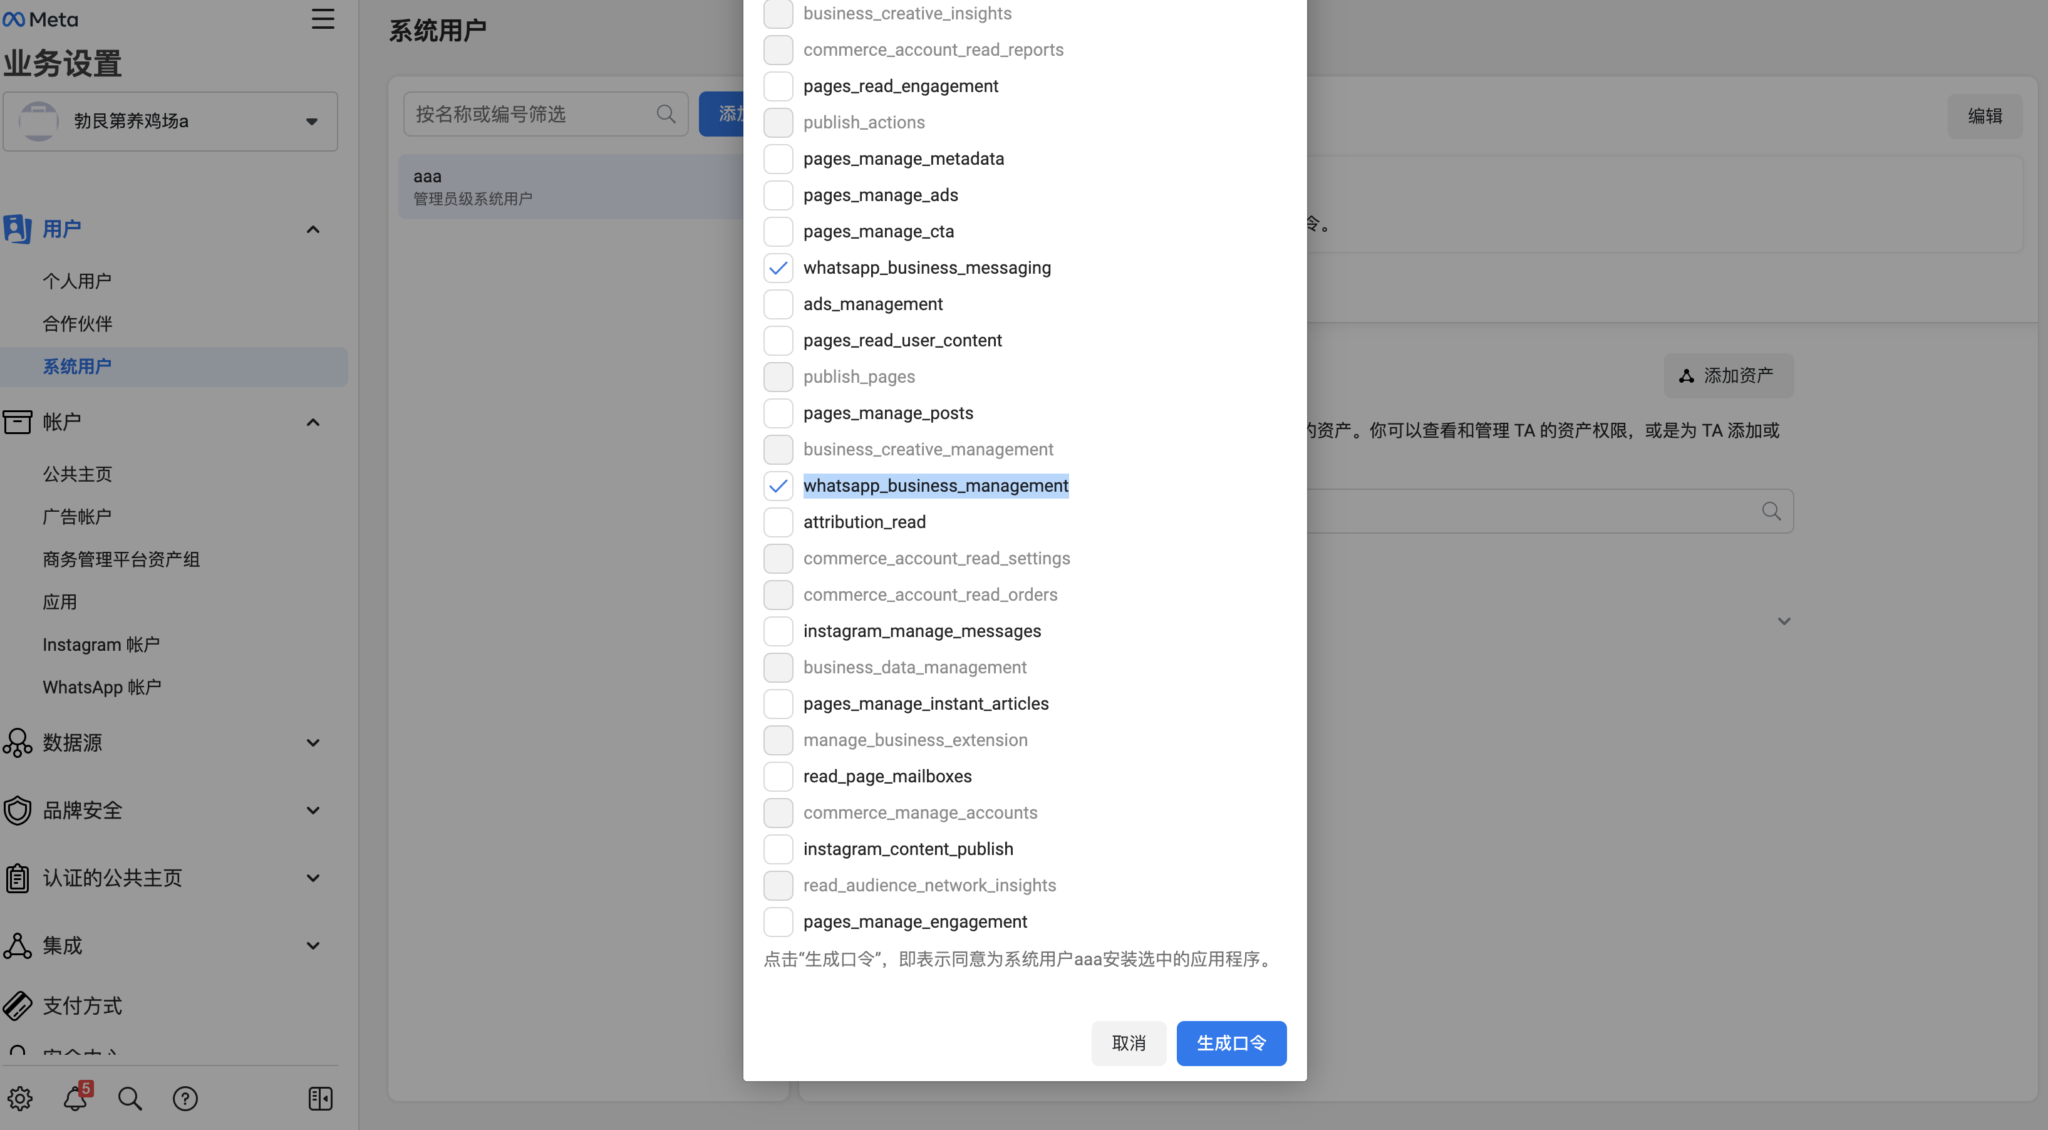
Check these three permissions:
- business_management
- whatsapp_business_messaging
- whatsapp_business_management
Then click "Generate Password" again.
Copy the access token shown:
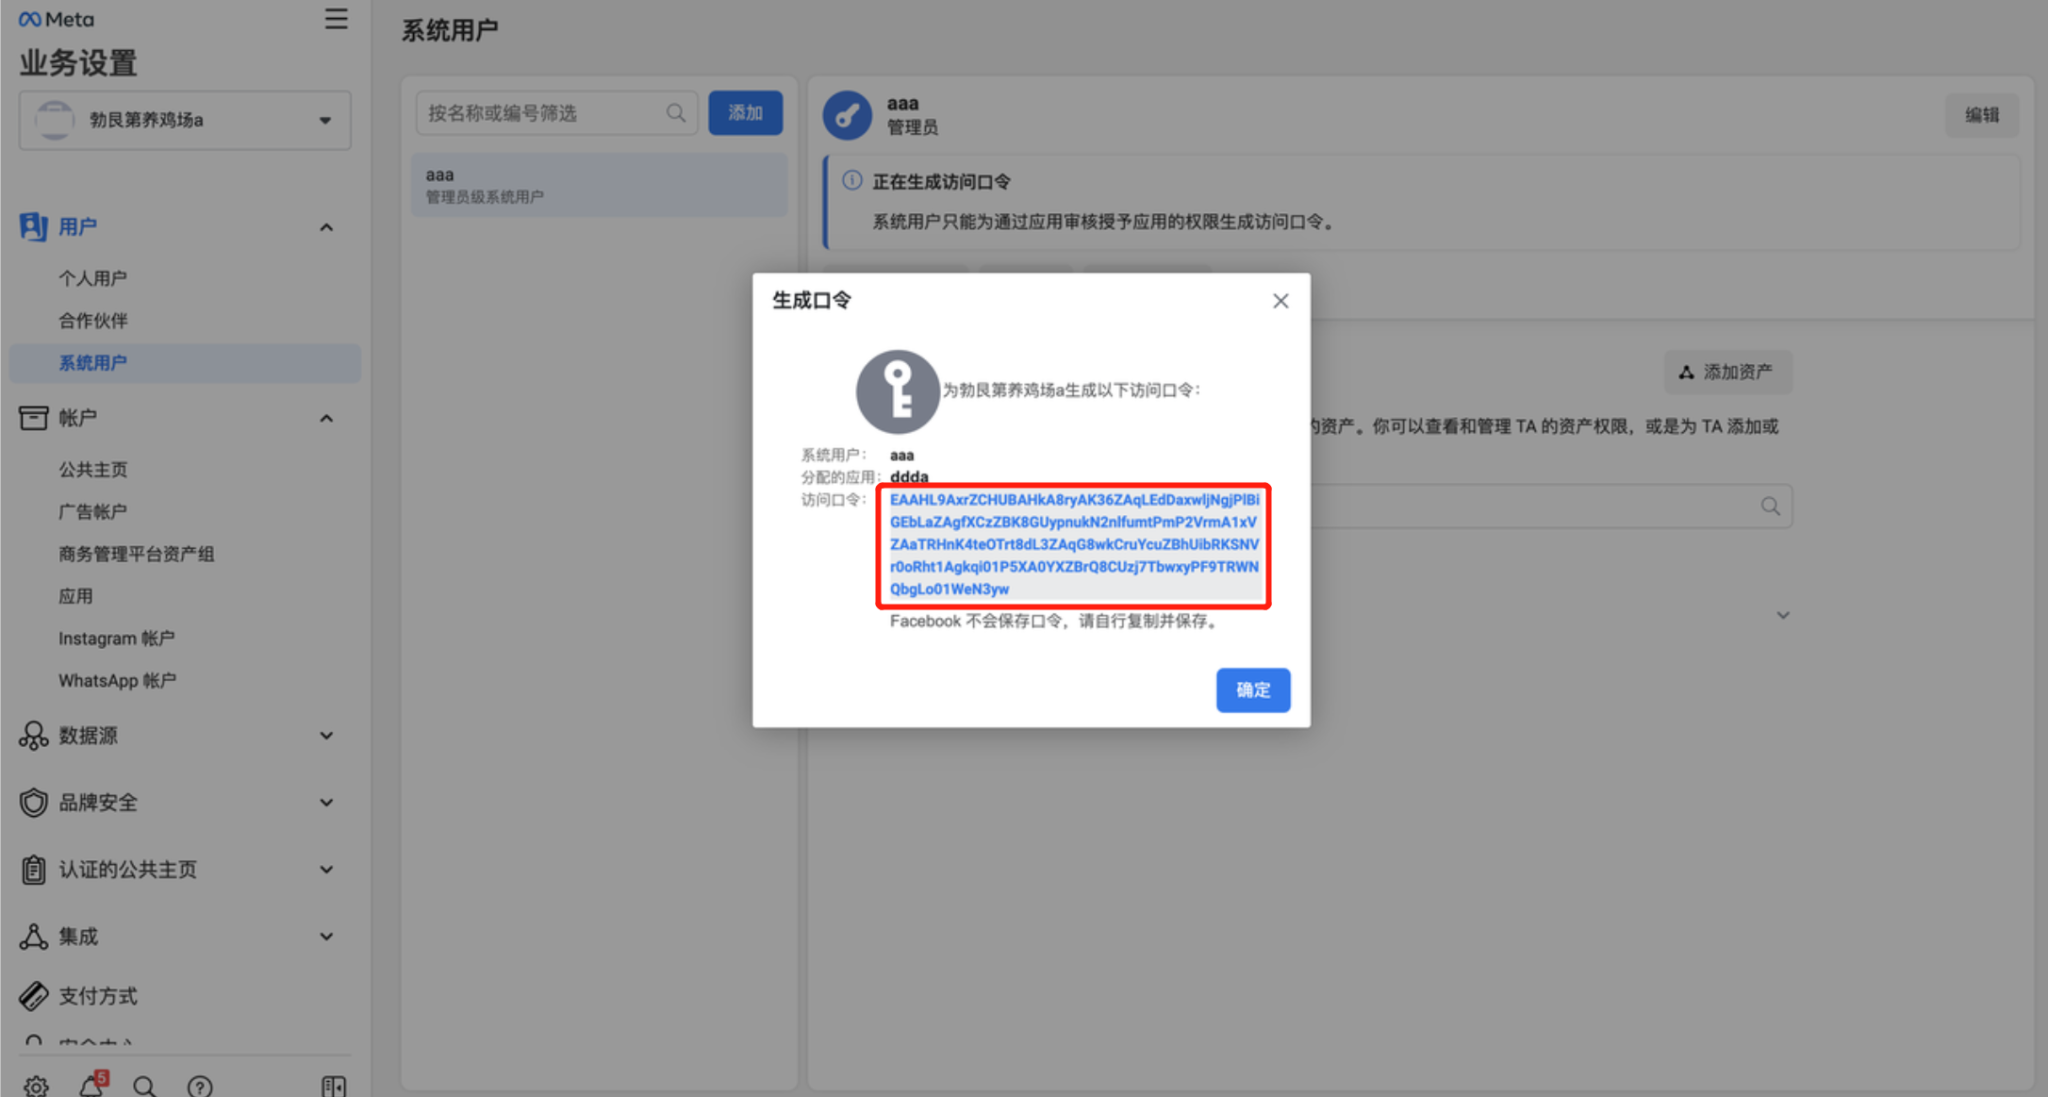
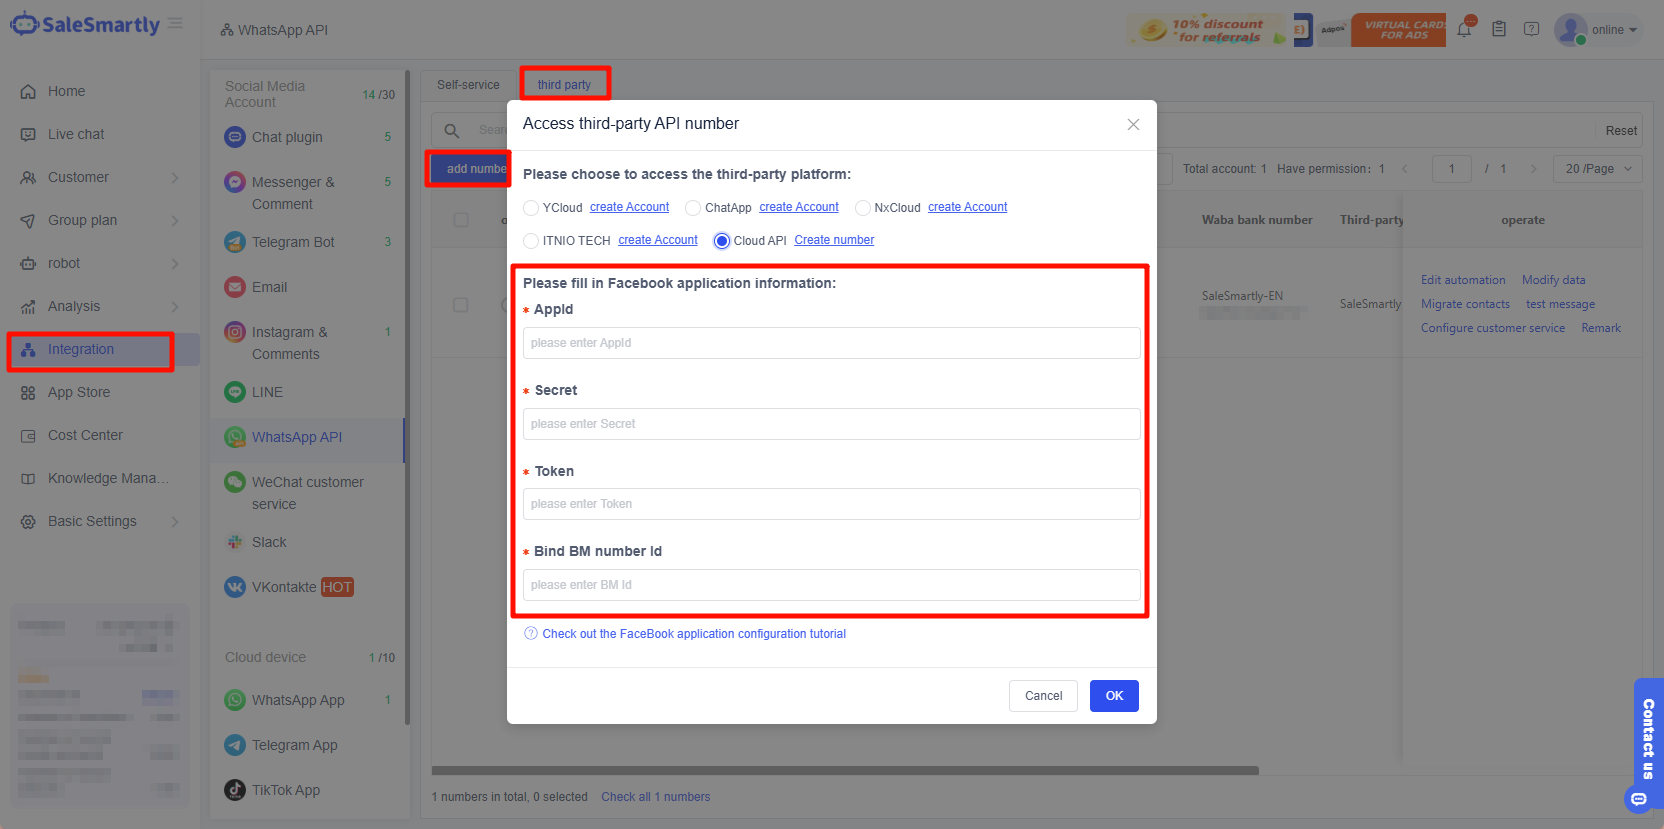
Paste this access token into SaleSmartly dashboard > Third Party > Access Third-Party API Number > Token.
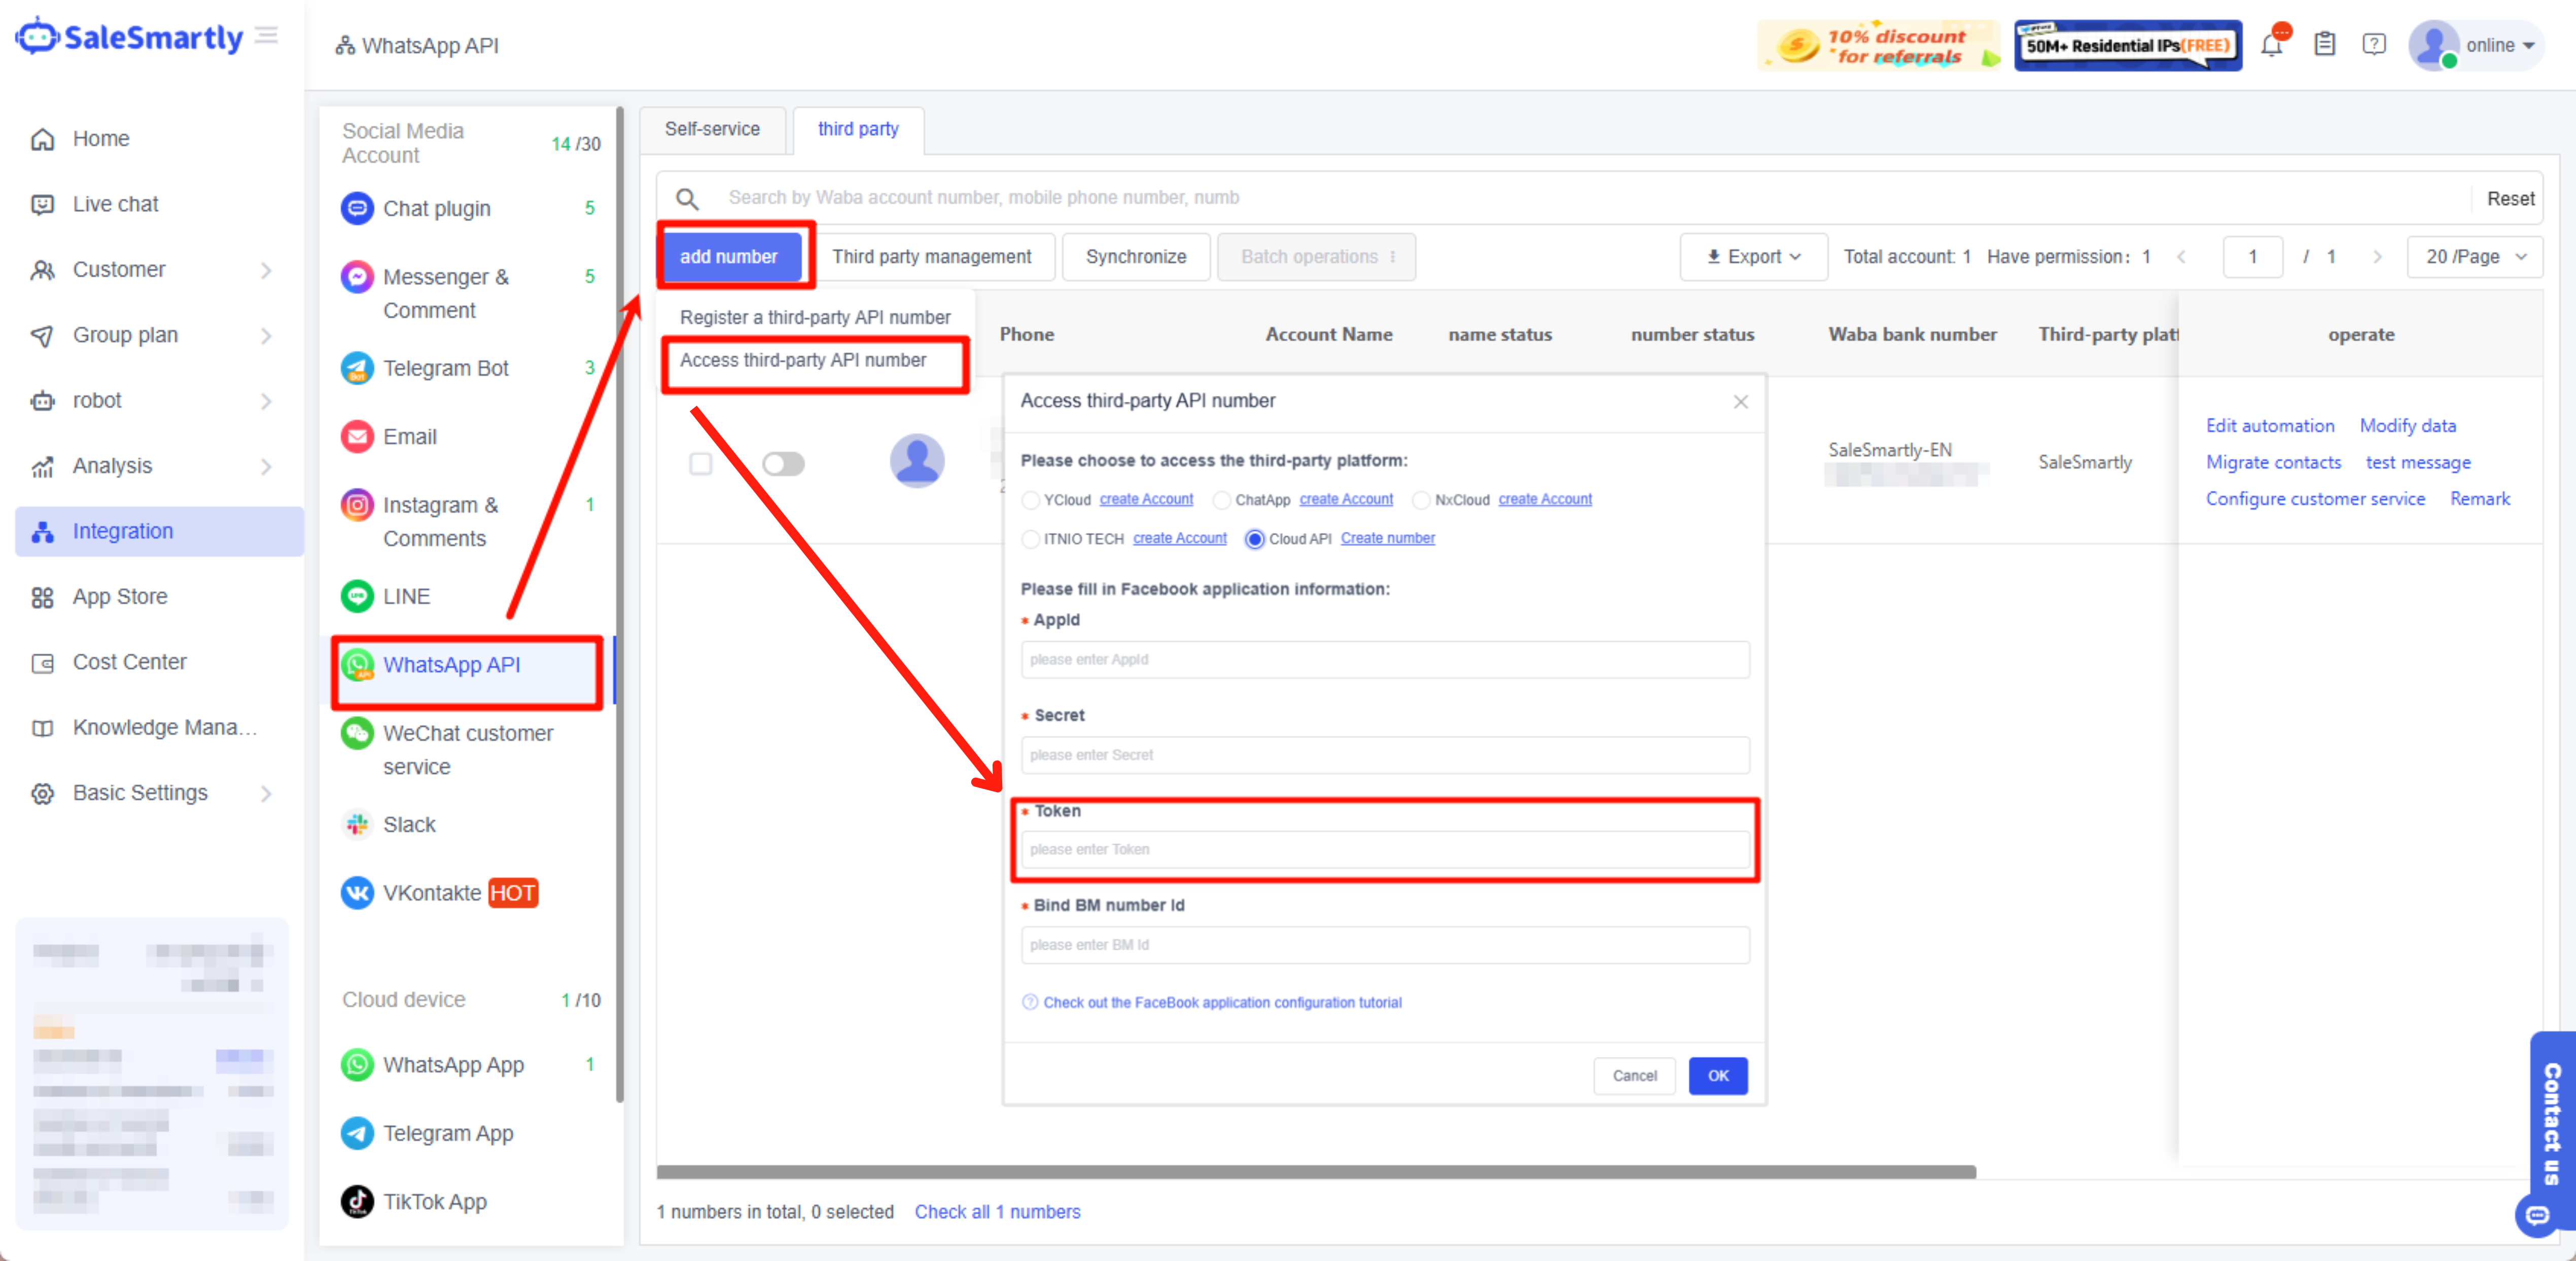
1.4. Complete Binding in SaleSmartly
When all fields are filled ("Appid", "Secret", "Token", and "Bound BM number id"):
- Click Next to access
- Successful access will automatically pull the first 50 numbers under WABA
- For numbers beyond 50, manually click "Synchronize Number" button
- After successful sync, enable the corresponding number
- You can now use the Cloud API number to:
- Import contacts
- Send message broadcasts
- Manage chats

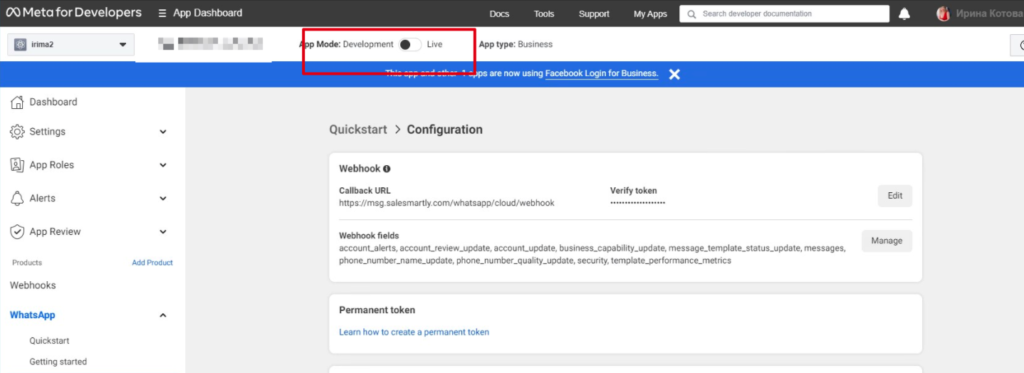
Finally, in the Meta developer dashboard, switch your created app to "Online" status (don't forget this crucial step!).
Your Cloud API number access is now complete.
PS: Learn how to create a number in Cloud API
2. Frequently Asked Questions
2.1. "You are temporarily prohibited from performing this operation"
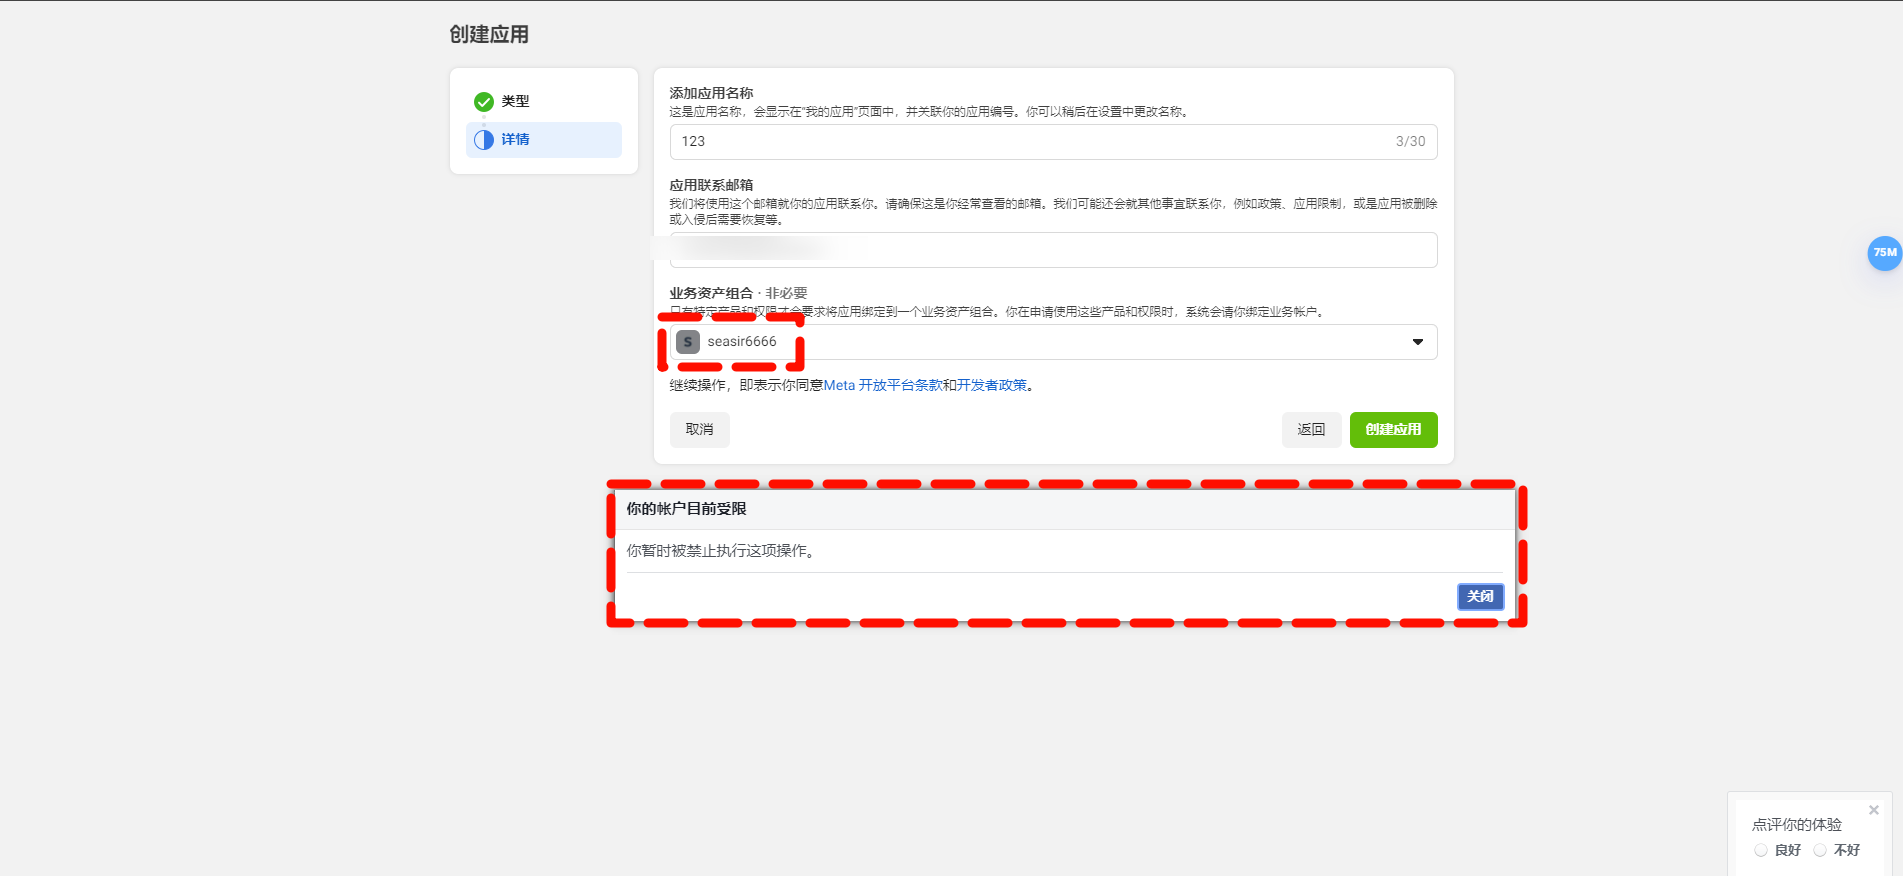
Reason: There's an issue with your Facebook Business Manager (BM) account. Please check it.
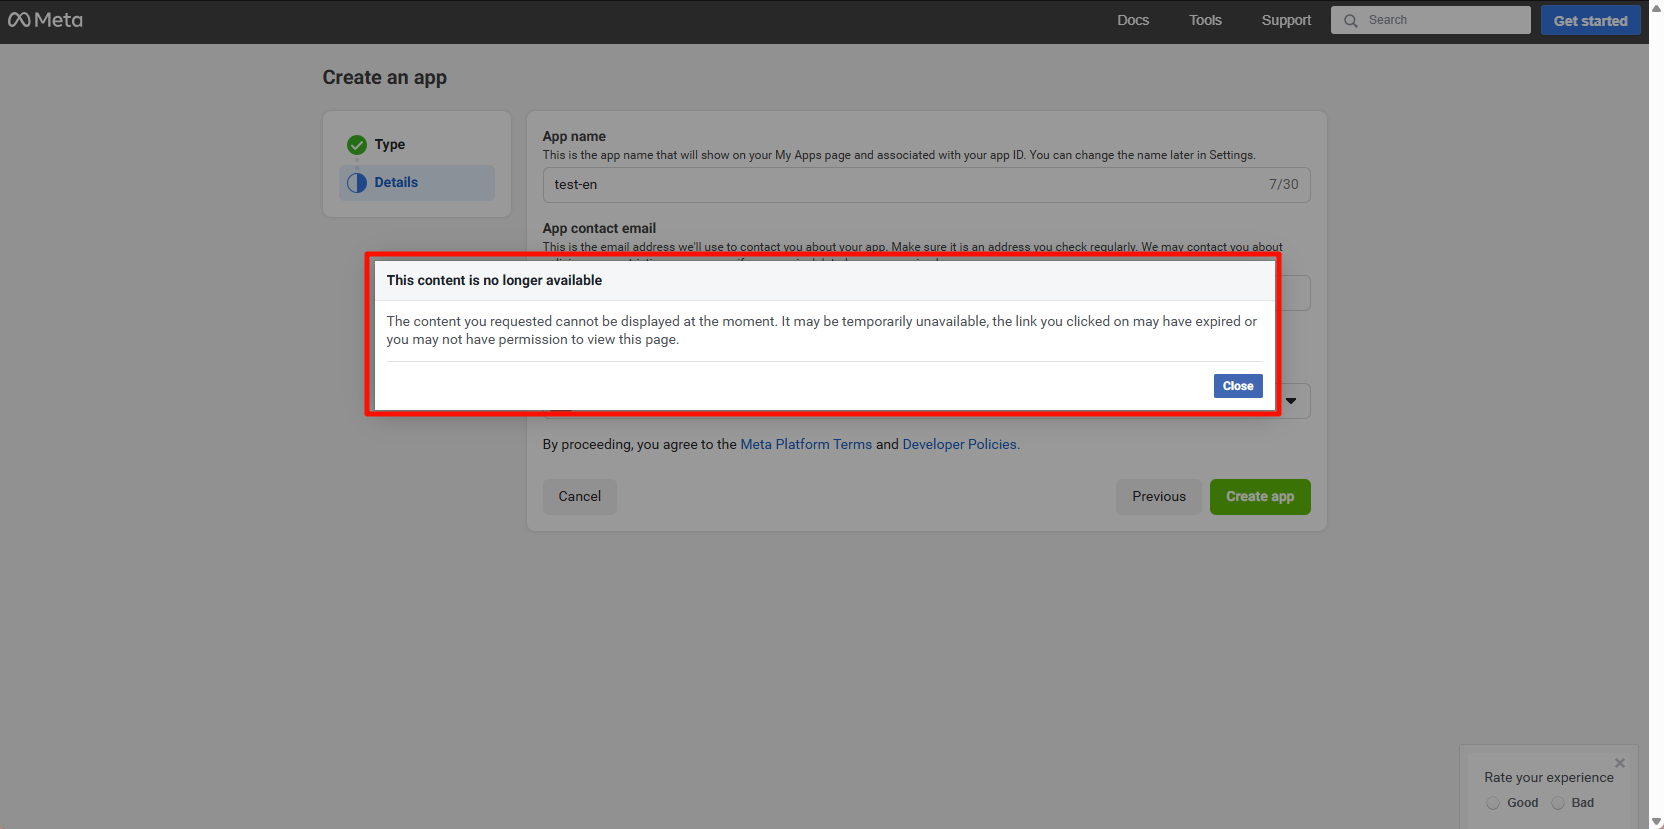
2.2. "The requested content cannot be displayed at this time"
Possible reasons:
- Content is temporarily unavailable
- Link has expired
- You don't have viewing permission
- App was deleted/blocked
- Associated WhatsApp number was blocked
Solution: Try using a different FB number.
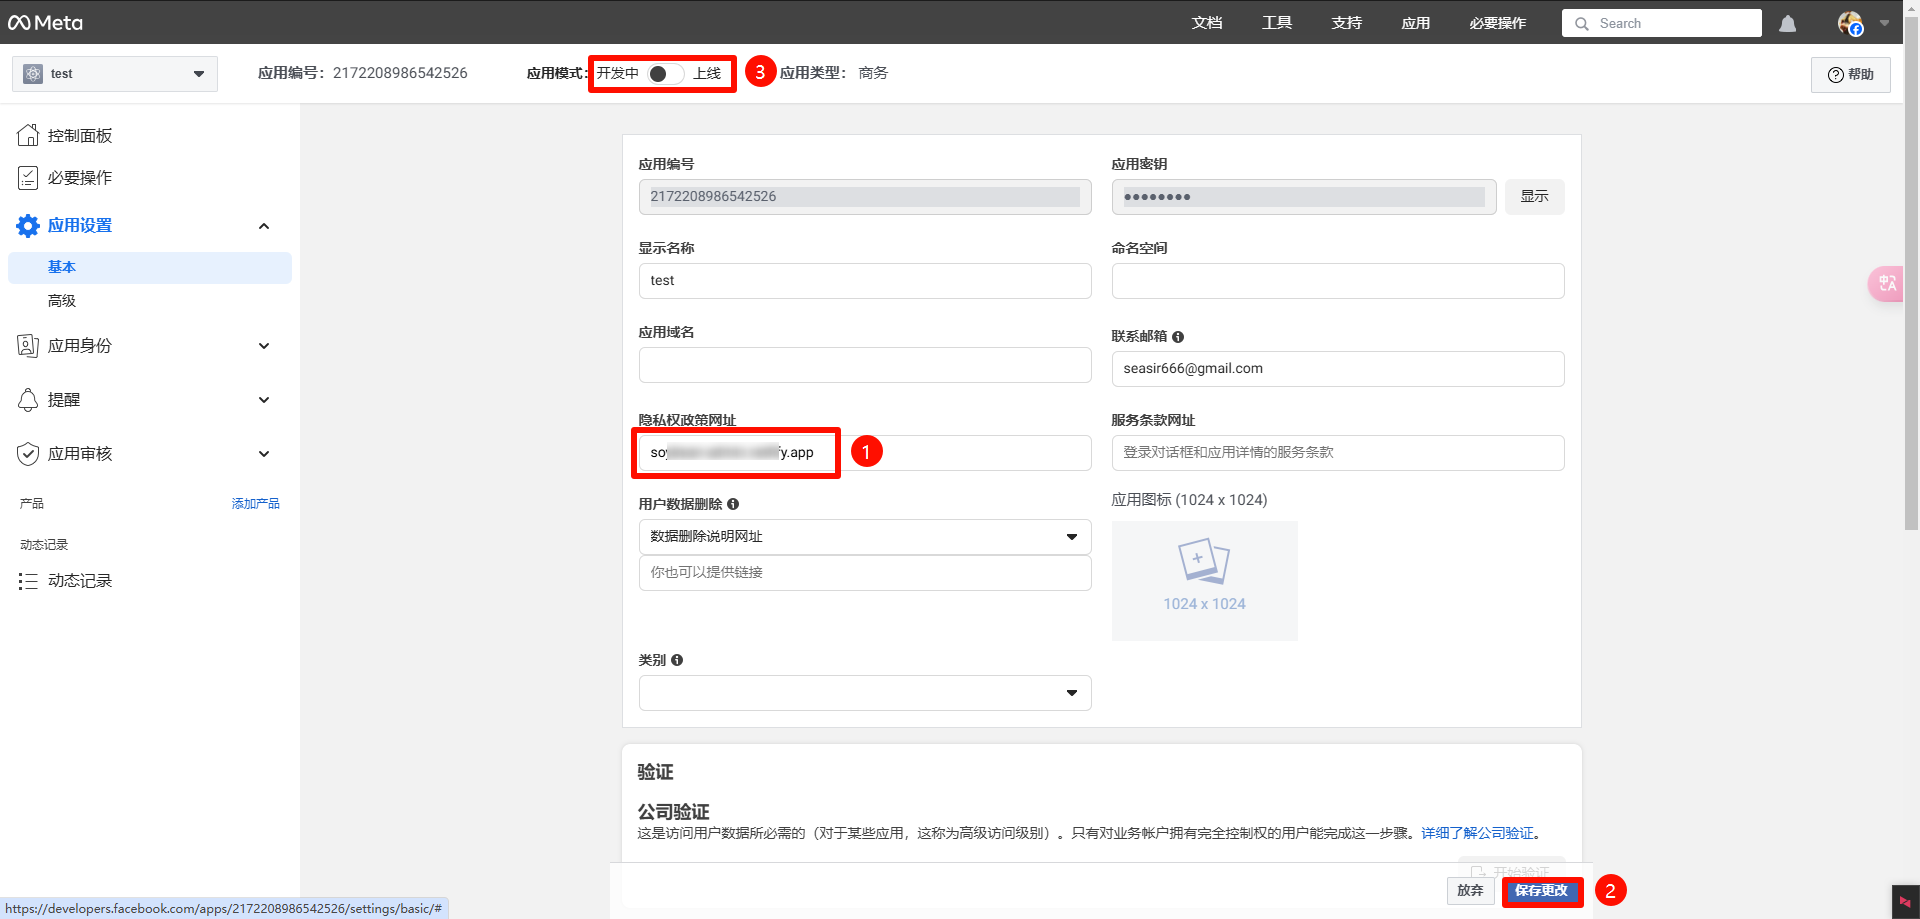
2.3. "The privacy policy URL is invalid"
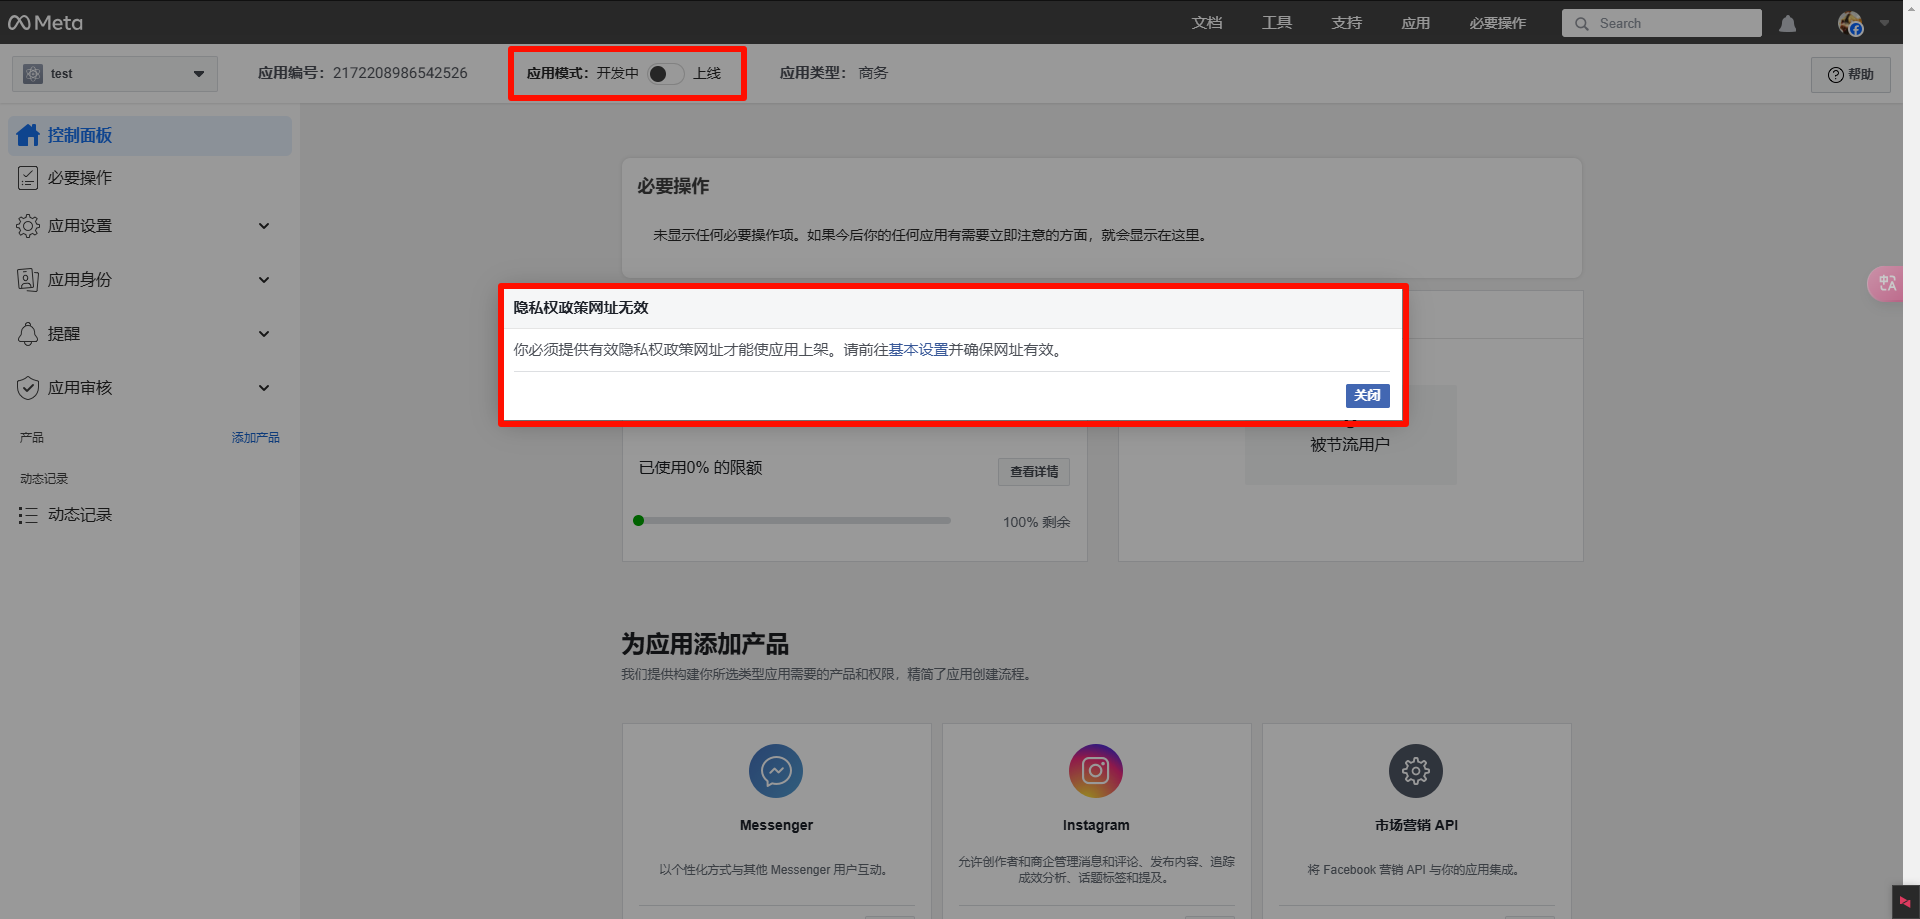
Scenario: When opening the application mode, the developer online switch prompts that you must provide a valid privacy policy URL.
Solution:
- Go to Basic Settings
- Fill in a valid privacy policy URL
- Save changes
- Turn on the App Mode Developer Online switch again
Warning: It's recommended to use a real, valid website address. Having your own website is preferable.