Member Conversation Access
1. Member Conversation Access: Only Let Members See Their Own Conversations
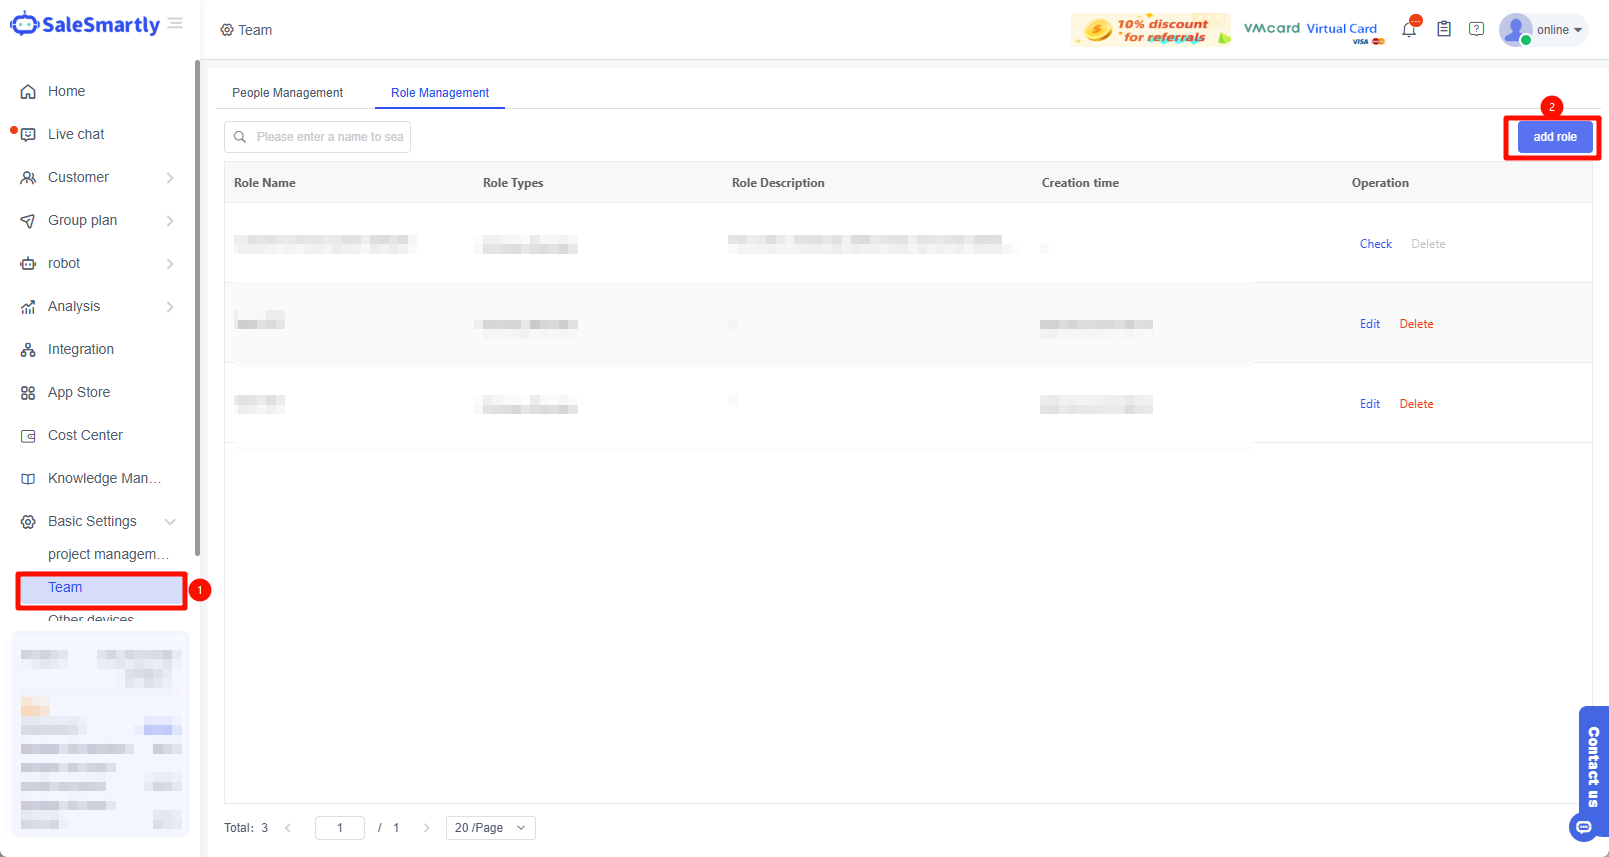
1.1 Add Roles
- Click Basic Settings - Team - Role Management - Add Role
- If you have already created a character, please jump to the steps to edit the character: Click to jump
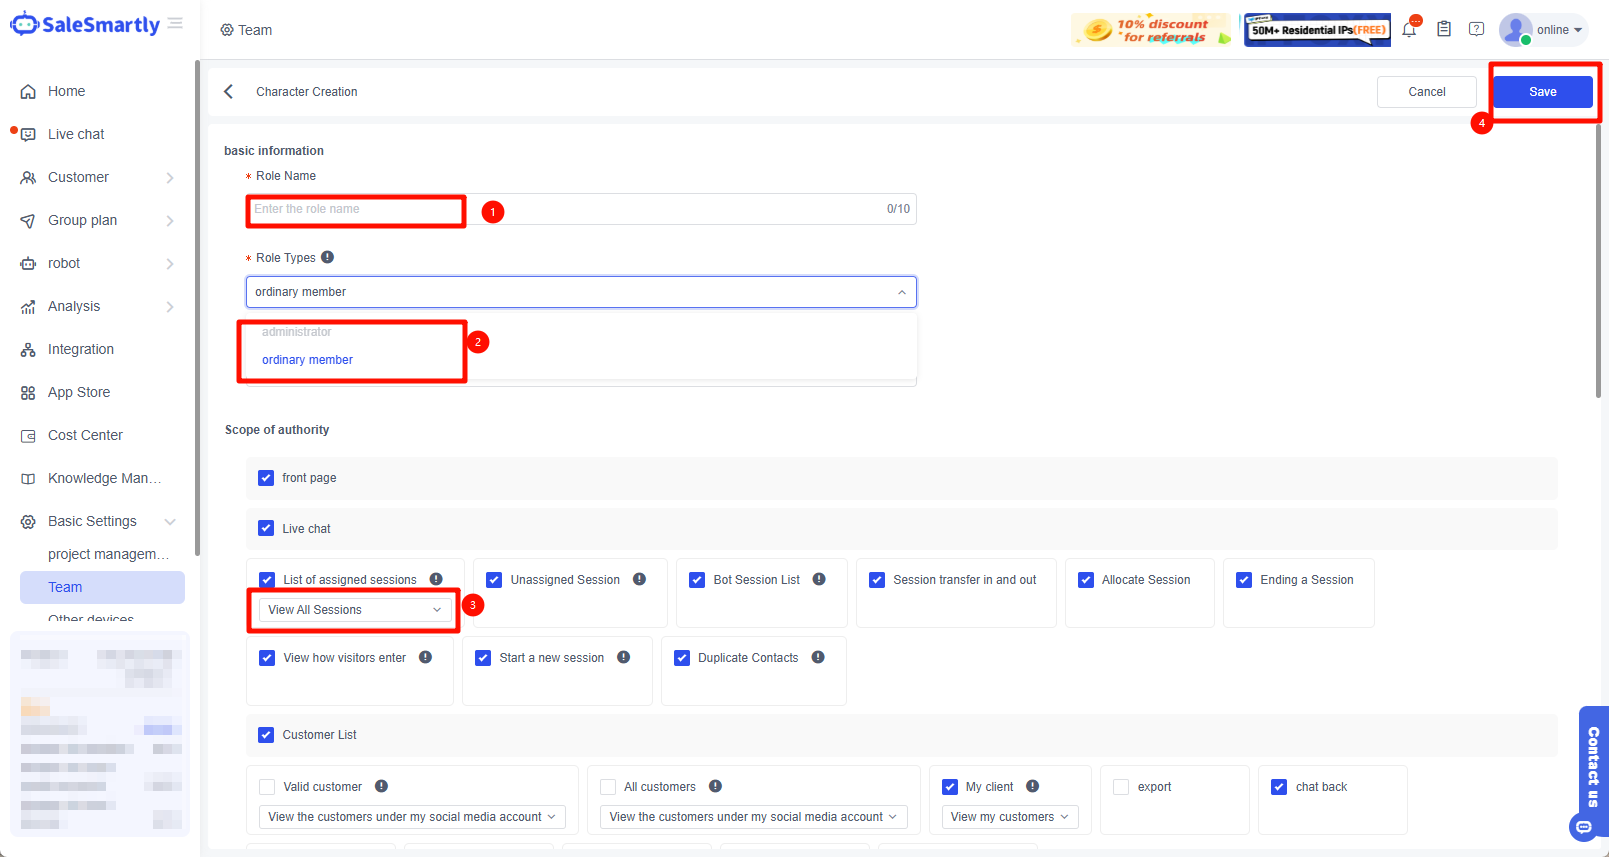
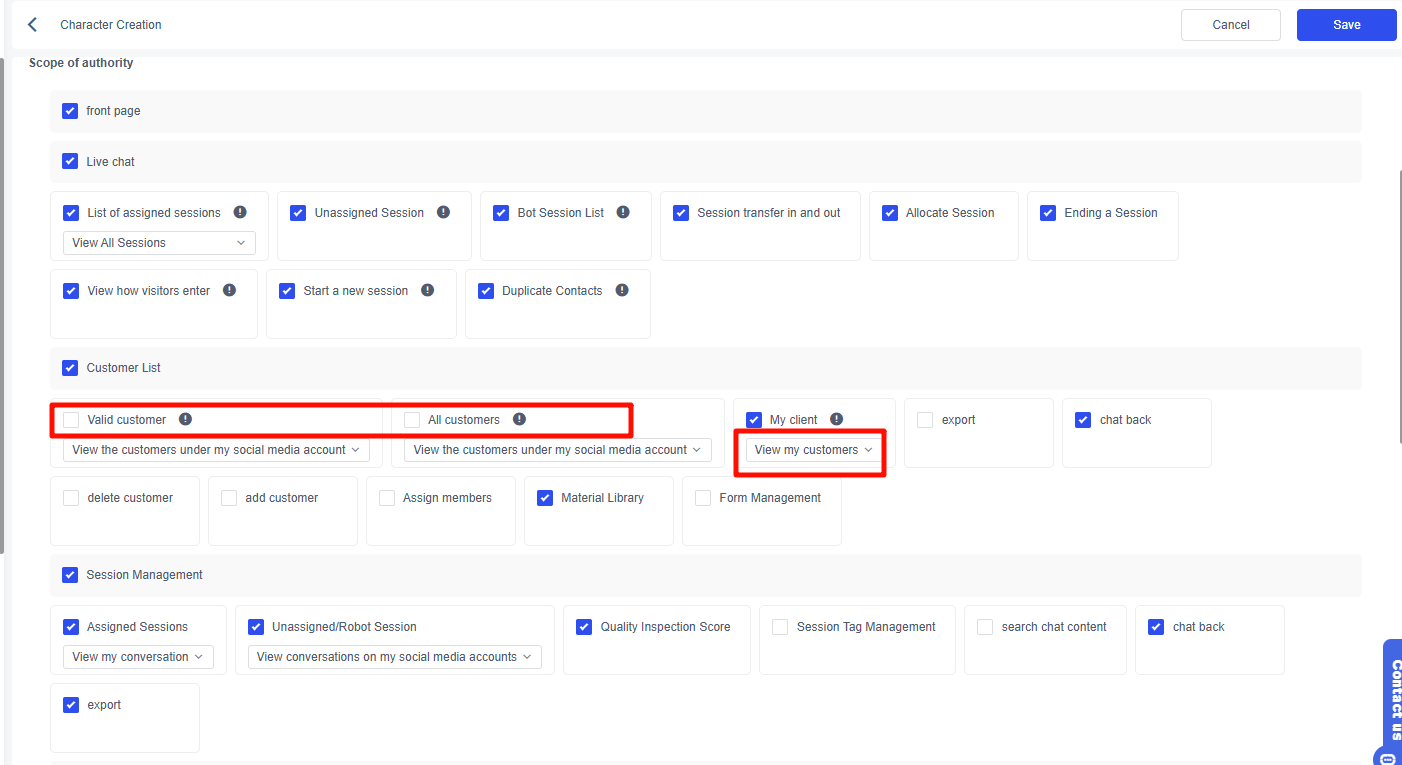
1.2 Create a Role and Edit and Save
- Enter the role name
- Select the role type
- Live Chat - List of Assigned Sessions - Select View My Sessions, then click Save in the upper right corner.
Administrators: can manage ordinary members, but cannot manage other administrators
Ordinary members: are managed by administrators and cannot change their roles or permissions
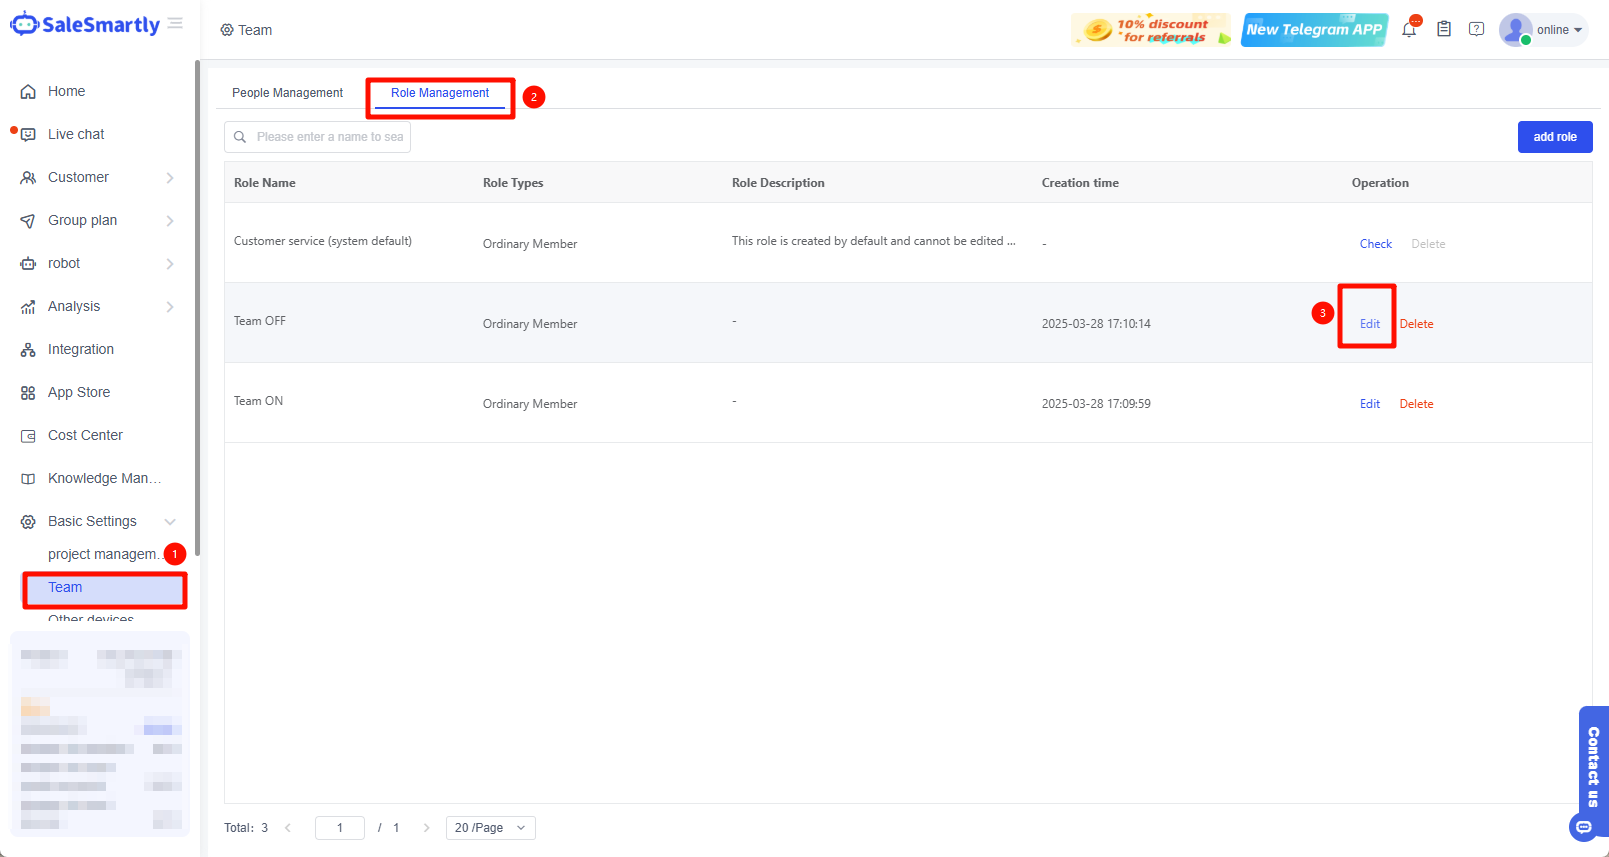
1.3 Edit Roles
Click Basic Settings - Role Management - Edit.
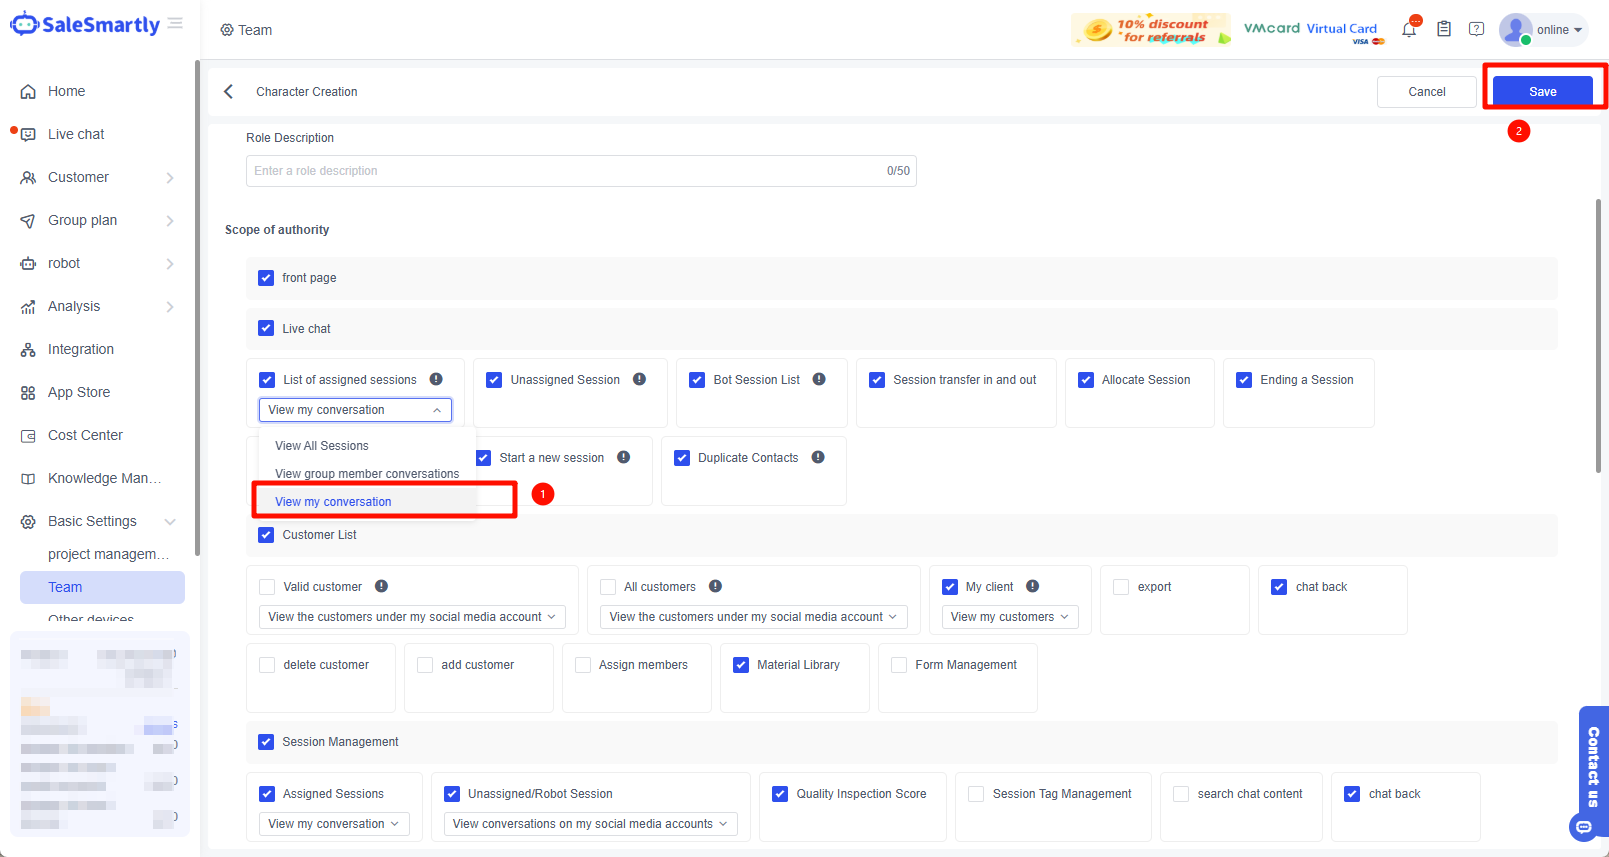
After entering, select Assigned Session List - Select View My Conversation, and then click Save in the upper right corner.
1.4 Set Roles for Members
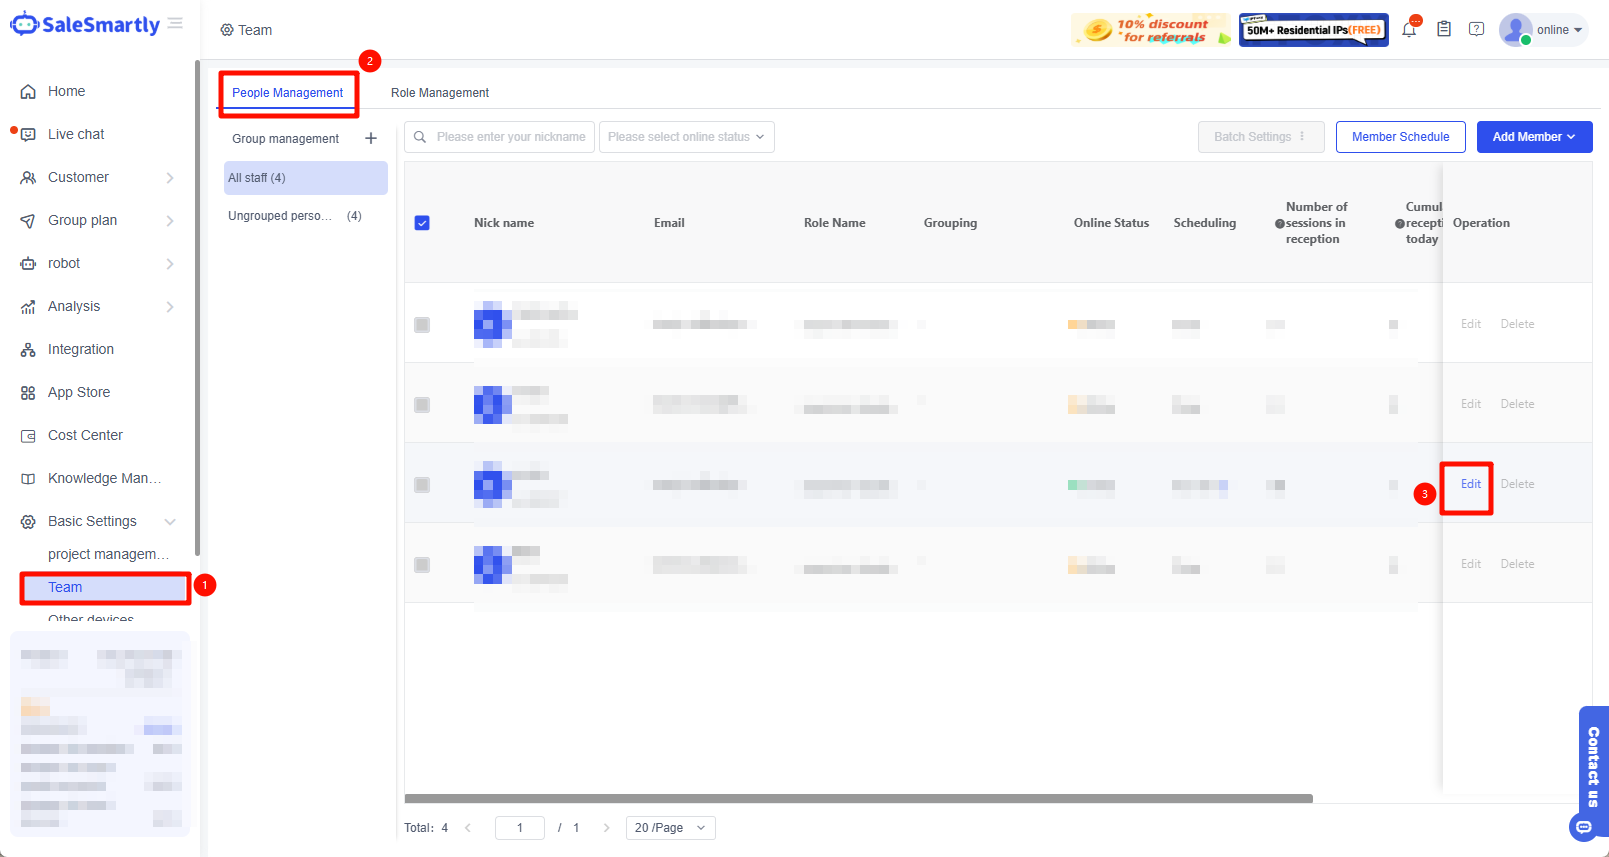
Click Basic Settings - Team - People Management - click the member you want to Edit.
Select the corresponding Role and click OK.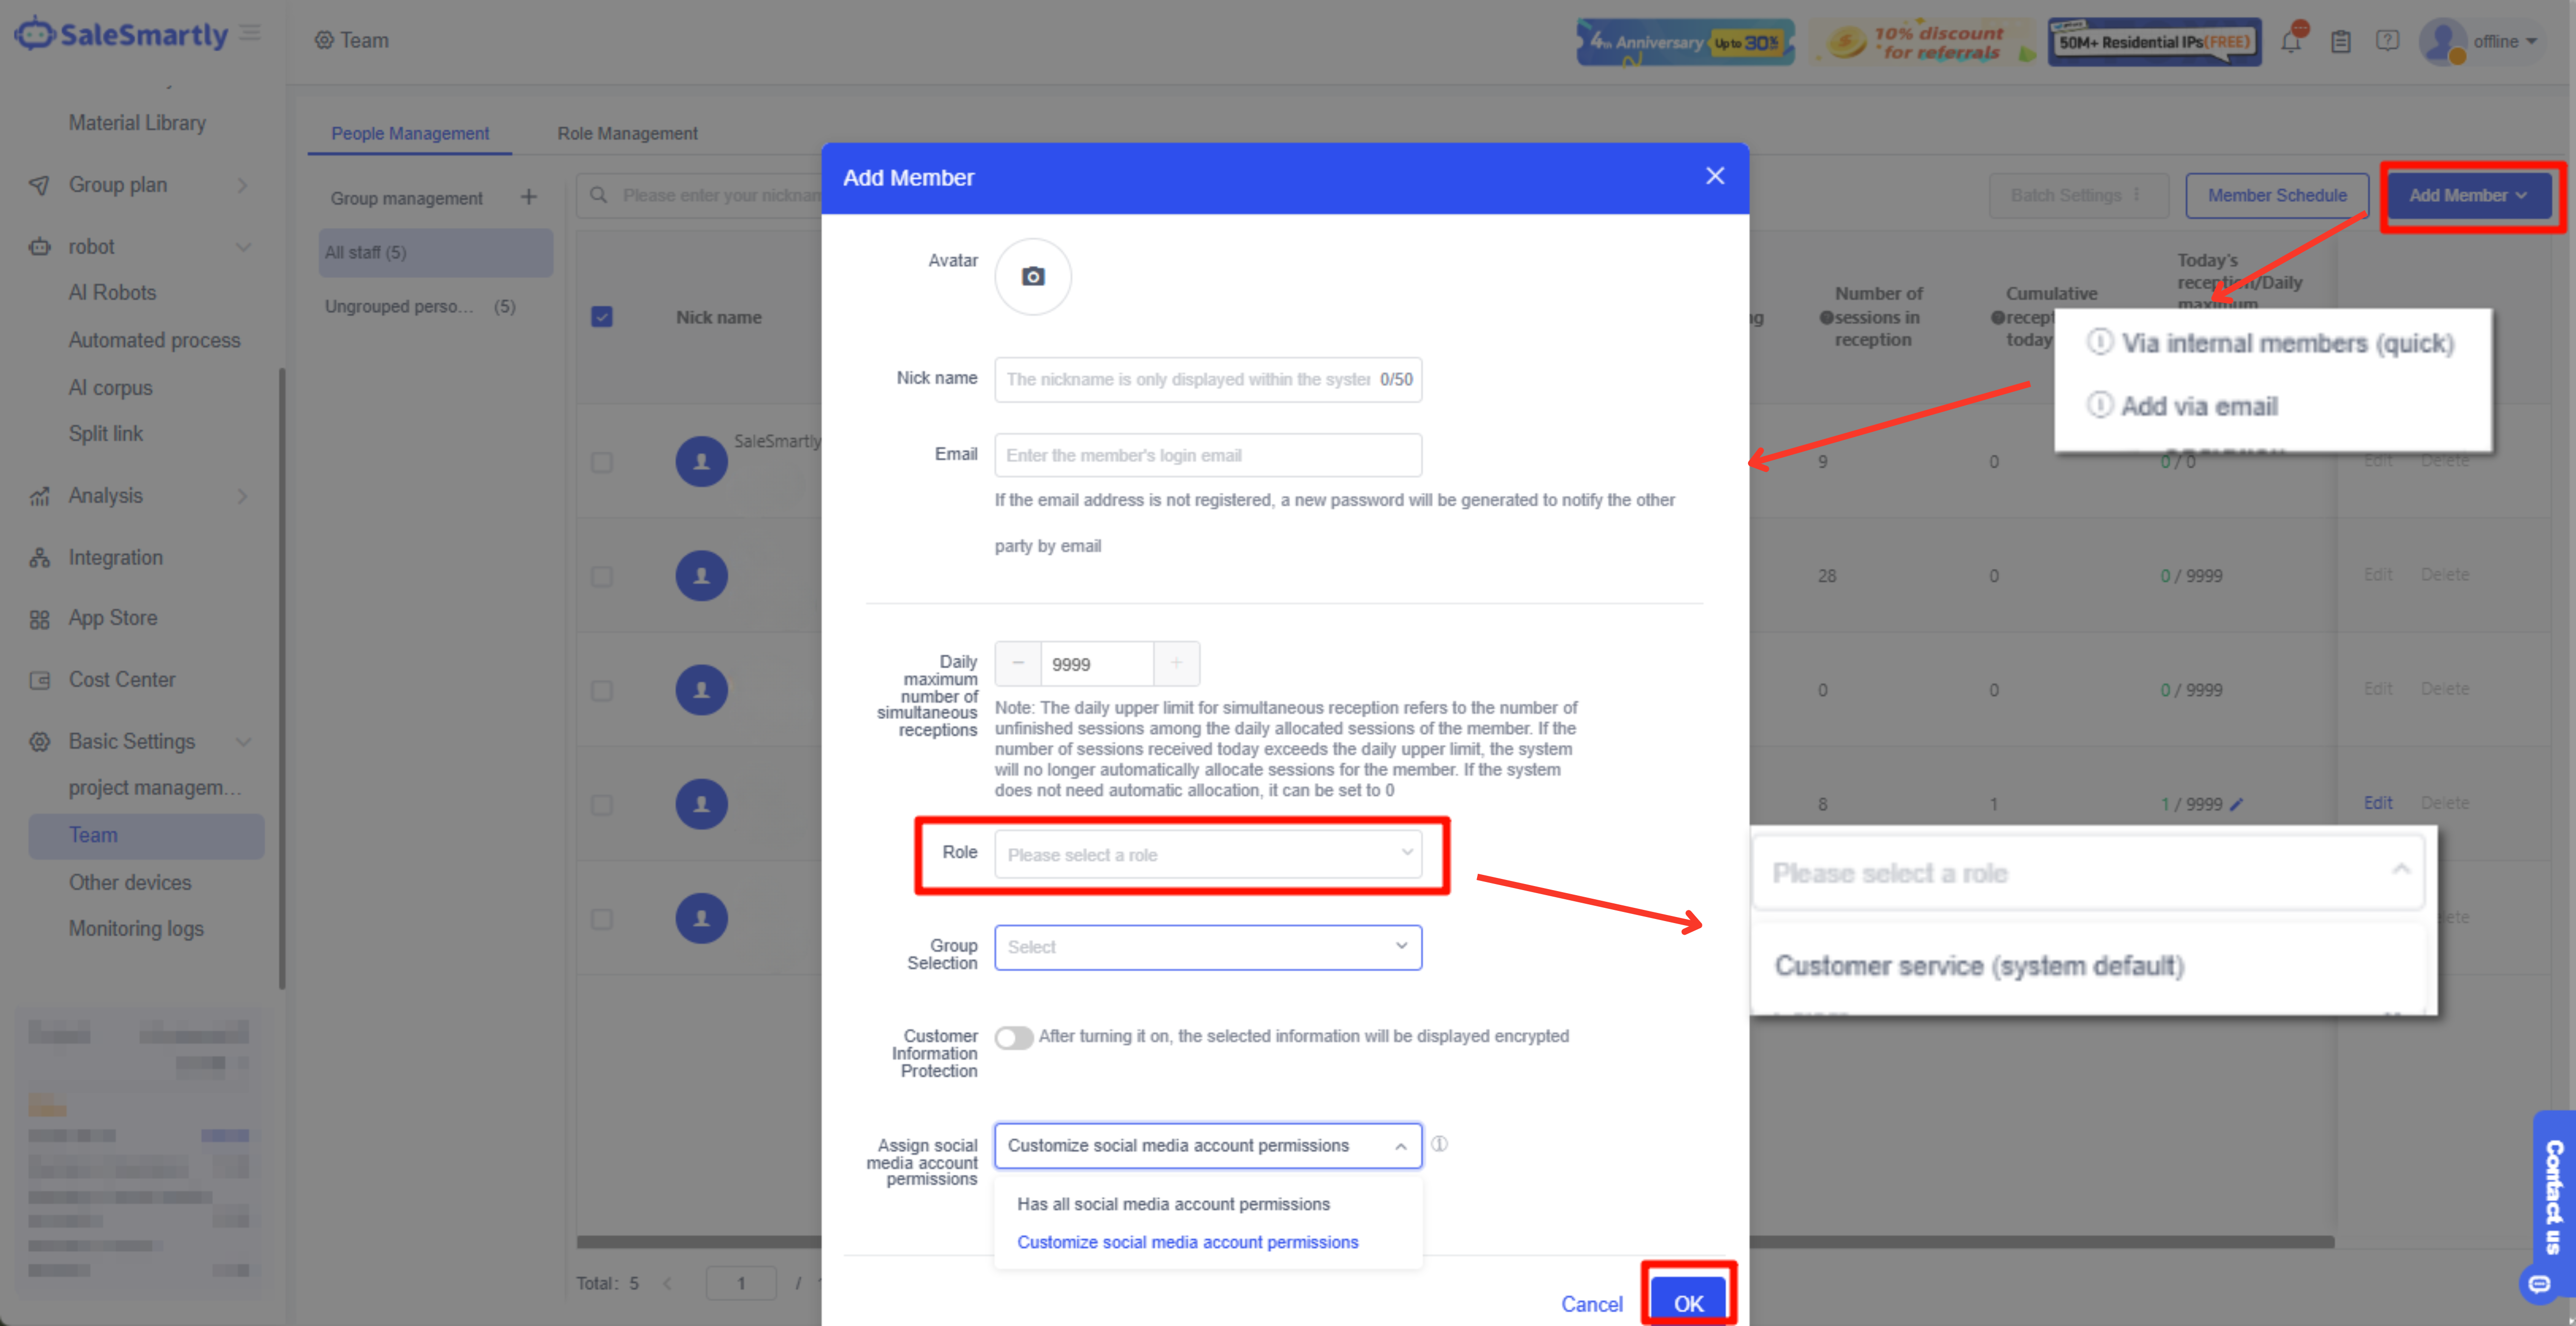
2. Social Media Session Permissions: Members Can See Conversations Hosted by Designated Social Media
2.1 Configure the Entry for Receiving Social Media Session Permissions
Click Basic Settings - Team - People Management - Edit
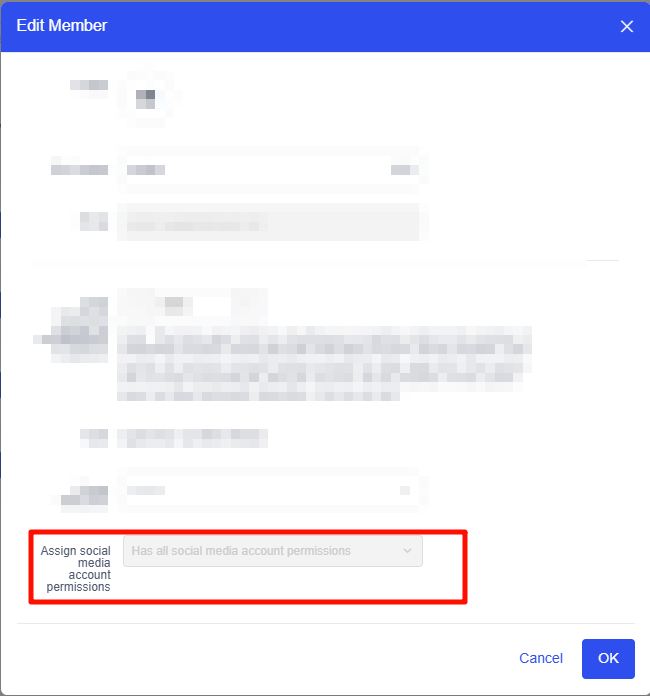
2.2 Configure Permissions
Select Customize social media account permissions, then click Configure
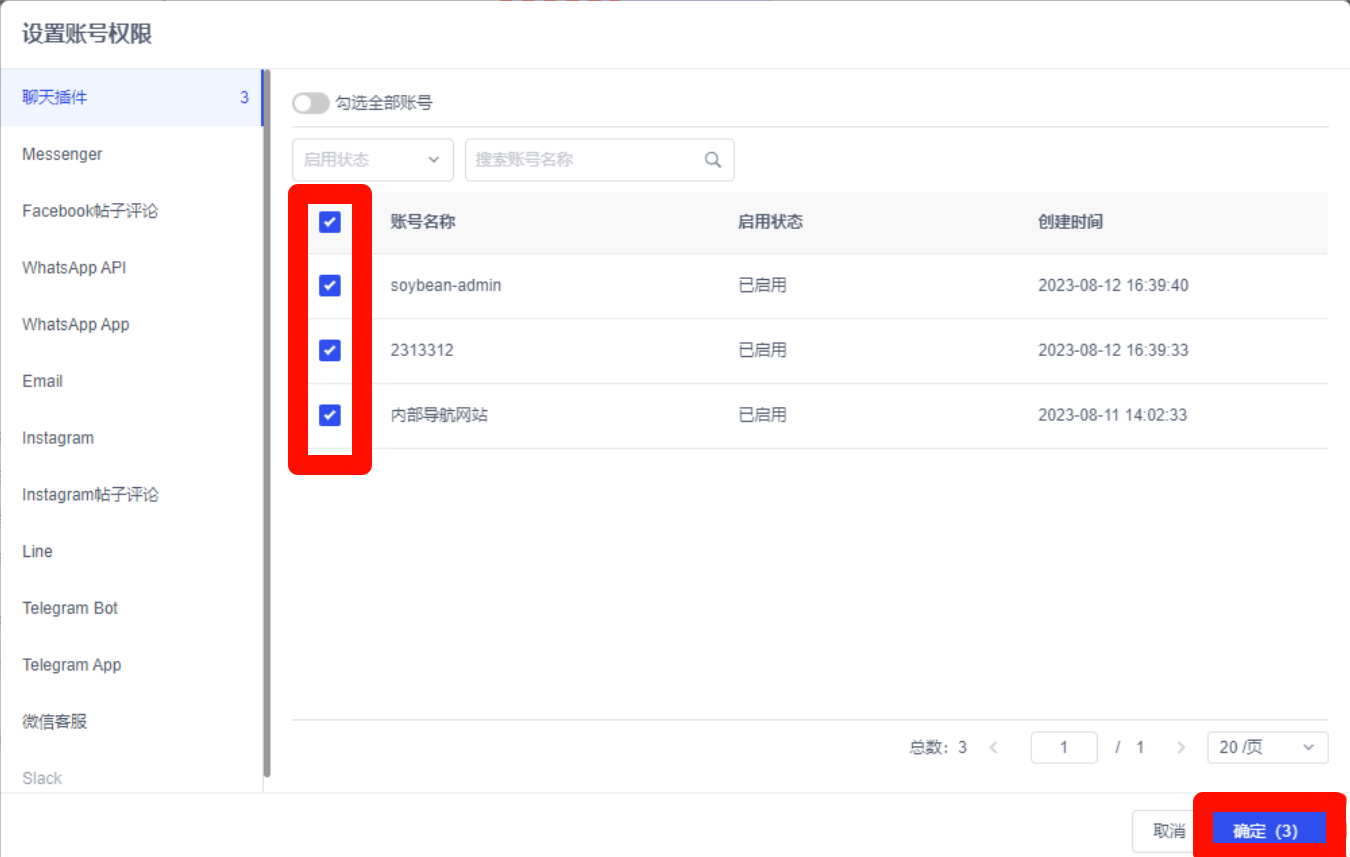
2.3 Check the Corresponding Social Media Permissions
Here you can select which social media account the member will receive the conversation message from. If you do not select it, you will not receive it. After checking, click OK to return.
3. Frequently Asked Questions
3.1 When Creating a New Member, a Prompt Appears Indicating That the Upper Limit of the Number of Members Has Been Reached
Click Cost Center - Change Package - Add members to increase the upper limit.